
“`html
Table of Contents
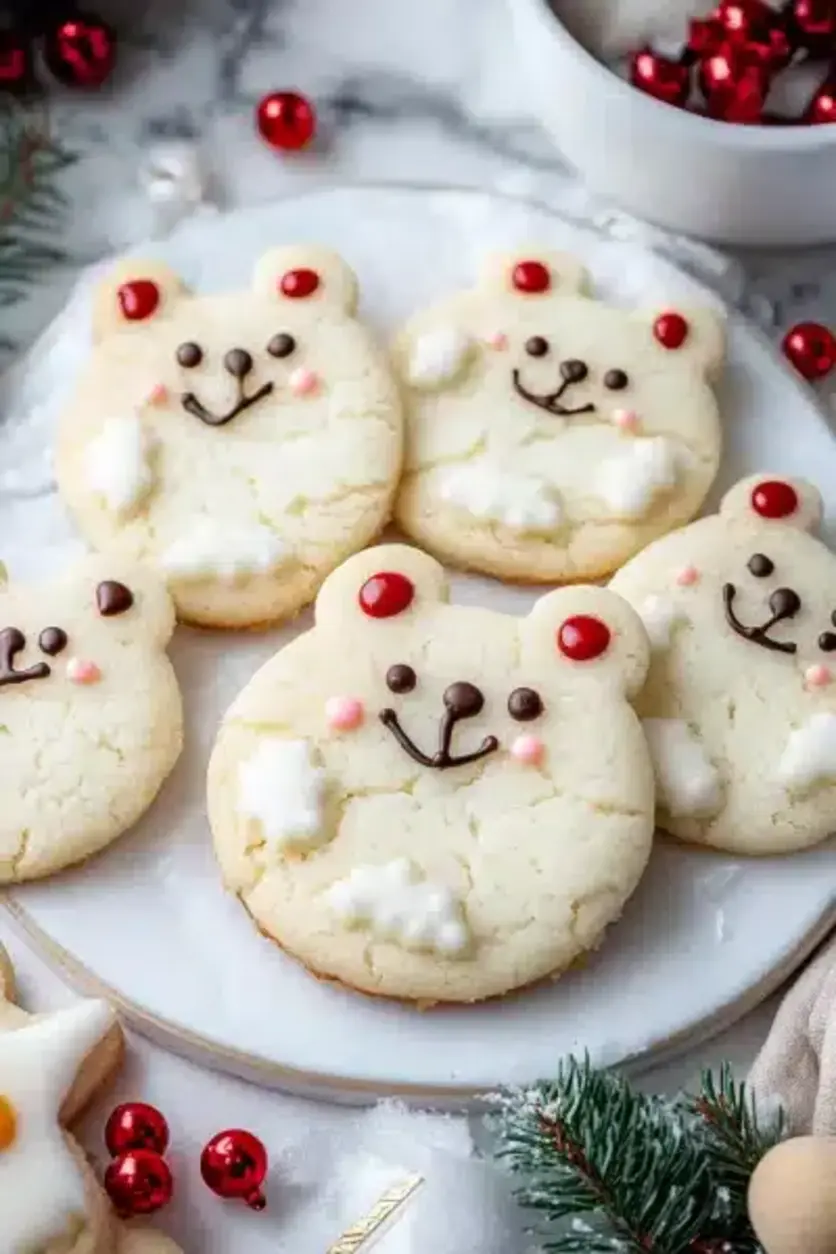
🐻 Whimsical Polar Bear Cookies: A Holiday Delight 🎄
Looking for a show-stopping, yet easy-to-make holiday cookie that truly captures the magic of Christmas? You’re in the right place!
A Sweet Welcome to Our Polar Bear Cookies!
The holiday season brings with it a flurry of festive activities, and for many, baking is at the heart of it all. But with so many classic Christmas cookies out there, how do you choose a recipe that’s both delightful to make and incredibly charming to look at? If you’re searching for a cookie that will bring smiles and a touch of winter whimsy to your dessert table, then these Polar Bear Cookies are an absolute must-try! They are wonderfully simple to assemble, making them a perfect activity for families, and the end result is undeniably adorable. Imagine a platter adorned with these sweet, snowy creatures – they’re guaranteed to be a hit with everyone, from the littlest cookie decorators to the most discerning sweet tooth. These aren’t just cookies; they’re little bundles of holiday joy, ready to spread cheer!
Gather Your Sweet Ingredients
The magic of these Polar Bear Cookies lies in their straightforward ingredients, creating a tender, buttery cookie that’s a dream to work with and even better to eat. We’ve also included some common substitutions to help you along!
- 1 cup (2 sticks) unsalted butter, softened: This forms the rich, creamy base of our cookies.
Substitution: If you’re out of unsalted butter, salted butter can be used, but reduce the added salt in the recipe by ¼ teaspoon. For a dairy-free option, use a high-quality vegan butter stick that bakes well. - 1 cup granulated sugar: For that perfect sweetness and a lovely crisp texture.
- 2 large eggs: These bind the dough and contribute to its tender crumb.
- 1 teaspoon pure vanilla extract: Enhances all the other flavors and adds a warm, comforting aroma.
Substitution: Almond extract can be used for a different, sophisticated flavor profile. - 3 cups all-purpose flour: The structure of our cookie. Sifted for a lighter texture.
Substitution: You can use a gluten-free all-purpose flour blend that contains xanthan gum, but the texture might be slightly different. - 1 teaspoon baking powder: For a gentle lift and soft texture.
- ¼ teaspoon salt: Balances the sweetness and intensifies flavors.
- For Decoration: Royal icing (white and black), pink candy melts or edible markers for noses, and edible googly eyes or small black candies.
Timing is Everything
Compared to average cookie recipes that might require longer chilling or baking times, these Polar Bear Cookies are relatively quick, making them ideal for busy holiday schedules. The shaping is the most time-consuming part, but it’s also the most fun!
Let’s Bake Some Polar Bears!
Step 1: Cream the Butter and Sugar
In a large mixing bowl, cream together the softened unsalted butter and granulated sugar using an electric mixer on medium speed. Beat until the mixture is light, fluffy, and pale yellow. This usually takes about 3-5 minutes. This creaming process is crucial as it incorporates air into the dough, leading to a tender cookie.
Step 2: Add Wet Ingredients
Beat in the large eggs, one at a time, ensuring each is fully incorporated before adding the next. Then, stir in the pure vanilla extract until just combined. Scrape down the sides of the bowl as needed to ensure everything is evenly mixed.
Step 3: Combine Dry Ingredients
In a separate medium bowl, whisk together the all-purpose flour, baking powder, and salt. Whisking them together beforehand ensures that the leavening agent and salt are evenly distributed throughout the flour, preventing pockets of saltiness or uneven rising.
Step 4: Form the Dough
Gradually add the dry ingredients to the wet ingredients, mixing on low speed until just combined. Be careful not to overmix, as this can lead to tough cookies. The dough will be soft but should hold together. If it’s too sticky to handle, cover the bowl and chill the dough for about 30 minutes.
Step 5: Shape the Polar Bears
This is where the fun begins! You’ll need small portions of dough to create your polar bears. For each bear, take a small ball of dough (about 1 tablespoon) for the body. Roll a slightly smaller ball (about ½ tablespoon) for the head and gently press it onto the body. Then, take two tiny pieces of dough (about ¼ teaspoon each) and flatten them slightly for the ears, pressing them into the top of the head. You can slightly flatten the bottom of the body to help them stand. Place the shaped cookies on a baking sheet lined with parchment paper.
Step 6: Bake to Golden Perfection
Preheat your oven to 350°F (175°C). Bake the shaped cookies for 10-12 minutes, or until the edges are lightly golden. The centers should still look slightly soft. Let the cookies cool on the baking sheet for a few minutes before transferring them to a wire rack to cool completely. This step is important to prevent them from breaking.
Step 7: Decorate Your Bears
Once the cookies are completely cool, it’s time for decorating! Use white royal icing to cover the body and head, leaving a small area on the face clear for the features. Use black royal icing to draw eyes and a nose, or use edible googly eyes and small black candies for the nose. Pink candy melts or edible markers can add a rosy touch to the cheeks. Get creative and let your polar bears come to life!
Nutritional Snapshot
While delicious, these cookies are a treat! A typical serving (1 cookie, without decoration) contains approximately:
- Calories: 150-180 kcal
- Carbohydrates: 18-22g
- Fat: 8-10g
- Protein: 2-3g
Note: Nutritional values are estimates and can vary based on ingredient brands and precise measurements. Decorations will add to these values.
Mindful Baking: Healthier Swaps
Looking for ways to enjoy these festive treats with a slightly lighter touch? Try these flavor-preserving alternatives:
- Reduced Sugar: Lower the granulated sugar by ¼ cup. You might notice a slightly less crisp cookie, but the flavor will still be lovely.
- Whole Wheat Flour: Substitute half of the all-purpose flour with whole wheat flour for added fiber and nutrients. Sourdough starter can also be incorporated to enhance digestibility and flavor.
- Natural Sweeteners: While not a direct swap for texture, consider using a touch of maple syrup or honey in the dough for a different sweetness profile, but be mindful of the liquid content.
- Lighter Icing: Opt for a simple glaze made with powdered sugar and lemon juice, or use melted dark chocolate for a richer, antioxidant-boosted decoration.
Serving & Presentation Ideas
These Polar Bear Cookies are a feast for the eyes and the palate! Serve them:
- Alongside a glass of cold milk or warm hot chocolate.
- As part of a festive cookie exchange or holiday cookie platter.
- Wrapped individually as charming edible gifts for neighbors, teachers, or friends.
- As a sweet companion to your afternoon coffee or tea.
Avoiding Common Cookie Pitfalls
To ensure your Polar Bear Cookies turn out perfectly with every bake, be mindful of these common mistakes:
- Overmixing the Dough: This develops the gluten too much, resulting in tough, flat cookies. Mix until just combined.
- Not Softening Butter Properly: If your butter is too cold or too melted, you won’t get the proper creamy texture when creaming with sugar, impacting the cookie’s structure.
- Baking at the Wrong Temperature: An oven that’s too hot will brown the cookies too quickly; too low and they won’t set properly. Always preheat your oven and use an oven thermometer if you’re unsure about its accuracy.
- Decorating Warm Cookies: This is a recipe for melted icing and smudged designs! Ensure cookies are completely cool before decorating.
Keeping Your Bears Fresh
Store your beautifully decorated Polar Bear Cookies in an airtight container at room temperature. They will stay fresh and delicious for up to 5-7 days. Avoid stacking them too high if they have delicate decorations to prevent crushing. For longer storage, you can freeze undecorated cookie dough balls for up to 3 months, or bake and freeze decorated cookies (ensure icing is fully set and use parchment paper between layers). Thaw decorated cookies at room temperature.
Spread Holiday Cheer, One Bear Cookie at a Time!
These Whimsical Polar Bear Cookies are more than just a festive treat; they are an invitation to create joyful memories in the kitchen. Their charming appearance and delightful buttery flavor make them a standout addition to any holiday celebration. Whether you’re a seasoned baker or a beginner, this recipe is designed for success and guaranteed to bring smiles. So, gather your loved ones, put on some holiday music, and create these adorable bears. They’re sure to become a cherished part of your family’s holiday traditions!
Happy Baking and Merry Christmas!
Frequently Asked Questions
Can I make these cookies ahead of time?
Yes! The dough can be made and chilled for up to 3 days, or frozen for up to 3 months. Baked and cooled cookies, once decorated and completely dry, can be stored airtight for up to a week, or frozen.
What’s the best way to get sharp features for the polar bear’s face?
Using a piping bag with a small round tip for the royal icing will give you the most control for drawing eyes and noses. For very simple decorating, edible markers can also work well for small details.
Are these cookies very sweet?
The cookie itself is moderately sweet. The sweetness level can be adjusted with the amount of sugar in the dough and, more significantly, by the type and amount of icing used for decoration.
Can I make these cookies without royal icing?
Absolutely! You can use a simple buttercream frosting, melted chocolate, or even just leave them plain for a classic buttery cookie. However, royal icing dries hard, which is ideal for detailed decorating and stacking.
My cookies spread too much, what went wrong?
This is often due to overcreamed butter and sugar (too much air incorporated), or the dough being too warm. Make sure your butter is softened, not overly creamy, and chill the dough if it feels too soft to handle before shaping.
Polar Bear Cookies Recipe: Adorable, Soft, and Delicious!
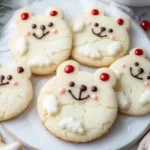
These adorable Polar Bear Cookies are made with a soft cream cheese cookie base, topped with creamy buttercream frosting, and decorated to resemble playful polar bears. Perfect for holiday parties, baking with kids, or adding a sweet, festive touch to your dessert table!
Ingredients
- 3/4 cupunsalted butter, room temperature (170g)
- 1/2 cupfull-fat cream cheese, room temperature (113g)
- 1 1/2 cupsgranulated sugar (300g)
- 1large egg, room temperature (56g)
- 2 tspvanilla extract (8g)
- 3 cupsall-purpose flour (375g)
- 1 Tbspcornstarch (8g)
- 1/2 tspbaking powder (2g)
- 1/2 tspfine salt (3g)
- 1 cupunsalted butter, room temperature (226g)
- 1 Tbspvanilla extract (12g)
- 1/2 tspfine salt (3g)
- 3 1/2 cupspowdered sugar (454gor 1 lb. box)
- 1/4 cupheavy cream (60g)
- 1 cupwhite sanding sugar
- 30large chocolate chips
- Round black sprinkles (for eyes)
- Round red or pink sprinkles (for cheeks)
Instructions
- In a large bowl, beat butter and cream cheese until smooth. Add sugar and cream until light and fluffy. Mix in egg and vanilla.
- In a separate bowl,whisktogether flour, cornstarch, baking powder, and salt. Gradually add dry ingredients to the wet mixture.
- Divide dough into two portions, wrap in plastic, and chill for at least 2 hours.
- Roll dough to 1/3-inch thickness and cut out 2 1/2-inch circles for faces and 3/4-inch circles for ears. Assemble polar bears by attaching ears to faces. Chill for 15 minutes.
- Bake cookies at 350°F (175°C) for 12–14 minutes or until edges are set. Cool completely.
- Beat butter until creamy for frosting. Add vanilla and salt, then mix in powdered sugar and cream until smooth. Pipe frosting onto cookies and dip in sanding sugar.
- Add a frosted oval for the muzzle, chocolate chips for noses, and sprinkles for eyes and cheeks. Enjoy your creations!
Notes
Chilling the dough is essential for preventing spread.
Store frosted cookies in an airtight container at room temperature for 2 days, in the fridge for up to 5 days, or freeze for up to 1 month.
For best results, don’t overbake the cookies.
Nutrition
- Calories: 205
- Sugar: 21g
- Fat: 10g
- Carbohydrates: 28g
- Protein: 2g
“`
Leave a Reply