Table of Contents
Cheesy Garlic Chicken Wraps Triple Cheese Infusion – The Ultimate Handheld Dinner
Growing up between the vibrant markets of Marrakech and the disciplined kitchens of Paris, I’ve always believed that the humblest ingredients can become a feast. These Cheesy Garlic Chicken Wraps are a testament to that philosophy. Here in New York City, where life moves at a mile a minute, I often find myself reaching for recipes that offer maximum comfort with minimal effort. This wrap features a triple cheese infusion that I perfected while experimenting with leftover rotisserie chicken and some artisanal cream cheese I found at an Union Square farmers market. It’s a fusion of French creamy textures and bold, garlic-forward American comfort food that satisfies every single time.
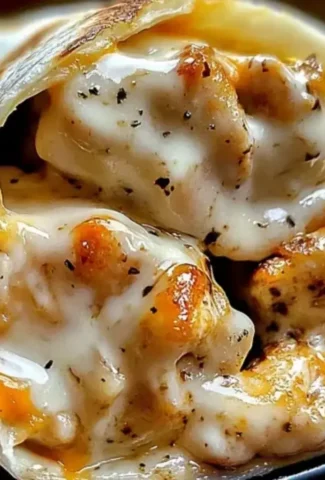
The sensory experience of these wraps begins with the aroma of fresh butter melting into minced garlic—a smell that always reminds me of my first week in culinary school. As you bite through the golden, toasted exterior of the tortilla, you’re met with a gooey, molten center of mozzarella and cream cheese, perfectly balancing the savory herbs. The Italian seasoning provides an earthy undertone, while the garlic powder doubles down on that pungent, savory kick we all crave. Visually, the wraps are a delight; the “seam-side down” searing technique ensures a sturdy, professional finish that keeps all that melted goodness locked inside rather than spilling onto your plate.
What sets my version apart from your standard deli wrap is the layering of hydration. Many chicken wraps end up dry, but by incorporating sour cream and softened cream cheese directly into the chicken mixture, I’ve ensured a moist, decadent filling that stays juicy even if you reheat it the next day. I’ll share a 💡 Samantha’s Pro Tip later about exactly how to soften your cheese for the smoothest texture, and I’ll warn you about one ⚠️ Common Mistake involving the heat of your pan that could turn your garlic bitter. This recipe is fast, but with these chef-led techniques, it will taste like you spent hours in the kitchen.
Why This Cheesy Garlic Chicken Wraps Recipe Is the Best
The Flavor Secret lies in the “Two-Tone Garlic” approach. By combining sautéed fresh garlic with concentrated garlic powder, I build layers of flavor that hit different parts of the palate. This is a technique I brought from my mother’s kitchen in Morocco, where we never rely on just one form of a spice. Bringing that aromatic depth to a simple chicken wrap creates a gourmet profile that far exceeds the effort required.
Perfected Texture is achieved through the dual-cooking method. We don’t just fill the wrap; we sear it. Utilizing a heavy-bottomed skillet in my NYC apartment allows me to get that “Parisian bistro” crunch on the tortilla while the residual heat creates a uniform melt within the cheese blend. This contrast between the crispy shell and the velvet-soft interior is what makes this the top-rated version of this dish.
This recipe is Foolproof & Fast because it utilizes pre-cooked chicken, which is a chef’s favorite shortcut for weeknight sanity. Whether you use a rotisserie chicken from the corner bodega or leftovers from a Sunday roast, the method remains consistent. It’s designed for the home cook who wants high-end results without the high-end stress, making it an ideal entry point for beginners.
Cheesy Garlic Chicken Wraps Ingredients
I usually pick up my tortillas from a small tortilleria in Queens, but any large flour tortilla from a US grocery store works perfectly. The key is in the freshness of the garlic; look for firm, white bulbs at your local market for the best aromatic payoff.
Ingredients List
- 2 cups cooked chicken (shredded or diced)
- 1 ½ cups shredded mozzarella or cheddar cheese
- ¼ cup cream cheese (softened)
- 2 tbsp butter (melted)
- 3 cloves garlic (minced)
- ¼ cup sour cream
- 1 tsp garlic powder
- 1 tsp Italian seasoning
- 4 large flour tortillas (burrito size)
- Salt and pepper (to taste)
- Fresh parsley (optional garnish)
Ingredient Spotlight
Cooked Chicken: The backbone of the wrap. Using rotisserie chicken provides a saltier, more seasoned profile. If you’re cooking it fresh, poaching in salted water keeps it tender.
Mozzarella vs. Cheddar: Mozzarella offers that classic “cheese pull” we love in NYC pizza, while a sharp Cheddar adds a punchy flavor. I often mix both for the best of both worlds.
Cream Cheese: This acts as the binder. It creates a “sauce” inside the wrap, preventing the chicken from feeling lonely or dry. Ensure it is full-fat for the richest mouthfeel.
| Original Ingredient | Best Substitution | Flavor / Texture Impact |
|---|---|---|
| Mozzarella | Monterey Jack | Meltier texture with a slightly more buttery finish. |
| Sour Cream | Greek Yogurt | Tangier flavor and a significant boost in protein—very NYC health-conscious. |
| Italian Seasoning | Herbes de Provence | Leans into my French training with floral lavender and fennel notes. |
How to Make Cheesy Garlic Chicken Wraps — Step-by-Step
Don’t worry about perfection; the beauty of a wrap is its rustic, handheld nature. Just follow these steps and you’ll have a gourmet meal in under 30 minutes.
Step 1: Sauté Garlic
In a skillet, melt the butter over medium heat. Add the minced garlic and sauté for 1-2 minutes until it becomes fragrant and translucent. This releases the essential oils that will flavor the entire wrap.
⚠️ Common Mistake to Avoid: Do not let the garlic turn brown. Burnt garlic tastes acrid and will ruin the delicate cream cheese base.
Step 2: Heat Chicken
Add the 2 cups of chicken to the skillet. Season with garlic powder, Italian seasoning, salt, and pepper. Stir well for 3-4 minutes until the chicken is hot and coated.
💡 Samantha’s Pro Tip: Use leftover rotisserie chicken; the preseasoned skin adds an extra layer of “umami” that plain chicken breast lacks.
Step 3: Mix Cheeses
In a bowl, combine the softened cream cheese, sour cream, and half of the shredded cheese. Mix until a thick, uniform paste forms. This creates the “internal sauce.”
⚠️ Common Mistake to Avoid: Using cold cream cheese will result in lumps. Microwave it for 10 seconds if you forgot to take it out of the fridge!
Step 4: Assemble and Cook
Divide the chicken mixture among 4 tortillas. Top with more cheese and roll tightly. Place seam-side down in the hot skillet and cook for 2-3 minutes per side until golden brown.
💡 Samantha’s Pro Tip: Press down gently with a spatula. This weight helps the cheese fuse with the tortilla, creating a structural “seal.”
| Step | Action | Duration | Key Visual Cue |
|---|---|---|---|
| 1 | Sauté Garlic | 2 mins | Translucent and fragrant but not brown. |
| 2 | Heat Chicken | 4 mins | Steam rising from the meat. |
| 3 | Mix Filling | 2 mins | Smooth, creamy consistency without clumps. |
| 4 | Pan Sear | 5 mins | Deep golden brown patches on the tortilla. |
Serving & Presentation
In my NYC kitchen, I like to slice these on a bias (a diagonal cut) to show off the melting layers. I serve them on a wooden board with a sprinkle of fresh parsley for a pop of color. It reminds me of the casual plating style in Moroccan cafes where the focus is on the freshness of the food.
Pairing these with a crisp side is essential to cut through the richness of the triple cheese filling. A simple arugula salad with a lemon vinaigrette or some sweet potato fries provides the perfect balance. If you’re feeling adventurous, a side of Harissa mayo adds a spicy Moroccan kick that complements the garlic beautifully.
| Pairing Type | Suggestions | Why It Works |
|---|---|---|
| Side Dish | Arugula Salad, Garlic Fries | Adds a peppery or starchy contrast to the soft filling. |
| Sauce / Dip | Ranch, Marinara, Harissa Mayo | Adds a cooling or spicy element for dipping. |
| Beverage | Iced Tea, Dry White Wine | Cleanses the palate from the rich cream cheese. |
| Garnish | Fresh Parsley, Red Pepper Flakes | Visual appeal and a slight heat or herb fresh finish. |
Make-Ahead, Storage & Reheating
As a professional cook in NYC, I’m a big believer in meal prep. You can prepare the chicken and cheese filling up to two days in advance and keep it in the fridge. This makes assembly a breeze when you come home after a long day of work.
| Method | Container | Duration | Reheating Tip |
|---|---|---|---|
| Refrigerator | Airtight glass container | 3-4 Days | Use an air fryer for 3 minutes to crisp the shell. |
| Freezer | Ziploc (Double Bagged) | 2 Months | Thaw overnight in the fridge before searing. |
| Make-Ahead | Bowl / Wrap with plastic | 2 Days | Keep filling separate from tortillas to avoid sogginess. |
When reheating, avoid the microwave if possible, as it makes the tortilla “gummy.” A toaster oven or a dry pan on low heat will restore that initial crunch. If you must use a microwave, wrap the wrap in a paper towel to absorb excess moisture.
Variations & Easy Swaps
| Variation | Key Change | Best For | Difficulty Impact |
|---|---|---|---|
| Mediterranean Twist | Add Spinach & Feta | Healthier feel | Easy |
| Spicy Buffalo | Add Buffalo Sauce | Game day snacks | Easy |
| Gluten-Free | GF Tortillas | Celiac-friendly | Easy |
Mediterranean Chicken Wrap
To take this recipe back to my roots, swap the Italian seasoning for a dash of cumin and paprika. Add chopped fresh spinach to the chicken while it’s heating. The result is a vibrant, earthy version of the wrap that pairs beautifully with a yogurt-based Tzatziki sauce for dipping.
Gluten-Free & Dairy-Free
For a gluten-free option, use almond-flour or corn tortillas. If you’re going dairy-free, utilize a cashew-based cream cheese and a vegan mozzarella melt. I’ve tested these for friends in NYC, and the cashew cream cheese actually provides a lovely nutty depth that complements the garlic surprisingly well.
NYC Deli Style
Inspired by bodega sandwiches, you can add center-cut crispy bacon and a thin layer of deli-style mustard. The acidity of the mustard cuts right through the mozzarella and cream cheese, creating a complex flavor profile that feels like a weekend brunch in Upper West Side.
Can I make these wraps ahead of time for lunch?
Absolutely! I often assemble them the night before and keep them tightly wrapped in foil. However, I suggest waiting to do the pan-searing until right before you eat. This ensures the tortilla is crisp. If you are taking them to work, sear them in the morning, let them cool, and then pack them; they are still delicious at room temperature.
What is the best type of chicken to use for this recipe?
For the best flavor and time management, use a rotisserie chicken. The meat is already seasoned and very tender. If you prefer to cook your own, I recommend pan-searing chicken thighs as they have a higher fat content than breasts, which prevents the wraps from becoming dry during the second cooking phase in the skillet.
How do I prevent my tortillas from tearing?
This is a common frustration! The trick is to warm your tortillas for 10-15 seconds in the microwave or a warm pan before rolling. This makes the gluten more pliable. Also, don’t overfill them; leaving about an inch and a half of space at the borders ensures you can tuck the ends in securely.
Can I freeze these Cheesy Garlic Chicken Wraps?
Yes, they freeze beautifully. Wrap each individual assembled wrap in plastic wrap and then place them in a heavy-duty freezer bag. They will keep for up to two months. To eat, thaw them in the refrigerator overnight and then sear them in a pan to get that signature crunch back.
Is there a way to make this recipe lighter?
You can certainly modify the ingredients to suit a lighter diet. Use low-fat cream cheese and swap the sour cream for non-fat Greek yogurt. You can also use whole-wheat tortillas or even large lettuce leaves. While the texture won’t be quite as indulgent, the garlic and herb seasoning will still provide plenty of satisfaction.
Share Your Version!
I would love to see how your wraps turned out! Did you go with mozzarella or try a sharp white cheddar? Please leave a star rating and a comment below to let me know your thoughts. Every little bit of feedback helps me refine these recipes for our wonderful community.
If you snapped a photo before devouring these, tag me @mykitchenstorie on Instagram or Pinterest. I love seeing my recipes come to life in your homes. Which side dish did you choose to pair with your wraps today?
From my NYC kitchen to yours — I hope this recipe brings as much warmth to your table as it does to mine. — Samantha 🧡
Love This Recipe? Save It to Pinterest!
If you enjoyed this Cheesy Garlic Chicken Wraps recipe, don’t let it get lost in your browser tabs! 😄 Pin it now so you can find it again anytime — and explore hundreds more tried-and-tested recipes waiting for you on my Pinterest boards.
👉 Follow Samantha on Pinterest @exorecipe
📌 Pin this recipe · 🔁 Re-pin your favorites · 💬 Tag me when you make it — I love seeing your creations!
Ready to cook? If you have any questions about the techniques I’ve shared, drop them in the comments! I reply to every single one. Happy cooking!
Cheesy Garlic Chicken Wraps

Ingredients
- 2 cups cooked chicken (shredded or diced)
- 1 ½ cups shredded mozzarella or cheddar cheese
- ¼ cup cream cheese (softened)
- 2 tbsp butter (melted)
- 3 cloves garlic (minced)
- ¼ cup sour cream
- 1 tsp garlic powder
- 1 tsp Italian seasoning
- 4 large tortillas
- Salt and pepper (to taste)
- Fresh parsley (for garnish, optional)
Instructions
- Sauté Garlic:
- In a skillet, melt the butter over medium heat. Add the minced garlic and sauté for 1-2 minutes until it becomes fragrant.
- Tip: Be careful not to burn the garlic as it will turn bitter.
- Heat Chicken:
- Add the cooked chicken to the skillet. Season with garlic powder, Italian seasoning, salt, and pepper. Stir well to coat the chicken evenly and heat through.
- Tip: Use leftover rotisserie chicken for added flavor and convenience.
- Mix Cheeses:
- In a bowl, combine the softened cream cheese, sour cream, and half of the shredded cheese. Mix until smooth.
- Tip: Ensure the cream cheese is softened for easy mixing.
- Combine Chicken and Cheese Mixtures:
- Remove the skillet from heat. Add the chicken to the cream cheese mixture and stir until fully combined.
- Assemble Wraps:
- Lay out the tortillas and divide the chicken mixture evenly in the center of each. Sprinkle the remaining shredded cheese on top. Fold the sides of each tortilla over the filling and roll tightly into wraps.
- Cook Wraps:
- Heat a clean skillet or grill pan over medium heat. Place the wraps seam-side down and cook for 2-3 minutes per side, until golden brown and the cheese is melted.
- Tip: Press down gently with a spatula for even browning and to help seal the wraps.
Leave a Reply