“`html
Table of Contents
- Delicious Christmas Cookie Bars Recipe
- Introduction: Festive Baking Made Easy
- Ingredients for Festive Cheer
- Timing Is Everything
- Step-by-Step Instructions to Christmas Bliss
- Nutritional Information: A Sweet Look
- Healthier Alternatives for Guilt-Free Indulgence
- Serving Suggestions: Elevate Your Treats
- Common Mistakes to Avoid
- Storing Tips: Keep the Festivity Going
- Frequently Asked Questions About Christmas Cookie Bars
Delicious Christmas Cookie Bars Recipe
Introduction: Festive Baking Made Easy
Are you searching for that perfect, crowd-pleasing holiday treat that doesn’t require hours in the kitchen? Data suggests that searches for “easy Christmas cookie recipes” surge by over 150% in December alone, with cookie bars often topping the list for their simplicity and shareability. This Delicious Christmas Cookie Bars Recipe is your answer to effortless festive baking. These delightful bars are packed with classic holiday flavors, are incredibly easy to whip up, and are perfect for sharing at parties, cookie exchanges, or simply enjoying with a cozy cup of cocoa. Forget intricate decorating; these bars deliver maximum festive cheer with minimal fuss!
Ingredients for Festive Cheer
The magic of these Christmas cookie bars lies in their accessible ingredients and the delightful flavors they create together.
- 2 ¼ cups all-purpose flour: The foundation of our cookie bar. Ensure it’s spooned and leveled for accuracy.
- 1 teaspoon baking soda: Provides lift and a tender crumb.
- 1 teaspoon salt: Balances the sweetness and enhances flavors.
- 1 cup (2 sticks) unsalted butter, softened: Crucial for richness and texture. Make sure it’s truly softened, not melted, for the best consistency.
- ¾ cup granulated sugar: For sweetness and that classic cookie flavor.
- ¾ cup packed light brown sugar: Adds moisture, chewiness, and a hint of caramel notes.
- 2 large eggs: Act as a binder, contributing to the richness and structure.
- 2 teaspoons vanilla extract: A fundamental flavor enhancer that smells like the holidays.
- 1 cup festive add-ins: This is where the fun truly begins! Think Christmas sprinkles, chopped chocolate chips (milk, dark, or white), dried cranberries, or finely chopped pecans. Use a combination for extra flair! (e.g., ½ cup sprinkles, ½ cup white chocolate chips).
Timing Is Everything
Compared to traditional cut-out cookies that can take an hour or more of active prep and decorating, these bars come together significantly faster, making them a weeknight-friendly holiday treat. The minimal cooling time is also a bonus!
Step-by-Step Instructions to Christmas Bliss
Preheat and Prep Your Pan
First things first, let’s get our oven and baking vessel ready! Preheat your oven to 350°F (175°C). This temperature is perfect for ensuring even baking without burning. Next, grab a 9×13 inch baking pan. For easy removal and cleanup, line it with parchment paper, leaving an overhang on the sides. This little trick will be your best friend when it’s time to lift the cooled bars out of the pan.
Create the Cookie Base
In a medium bowl, whisk together your dry ingredients: the all-purpose flour, baking soda, and salt. This ensures everything is evenly distributed, preventing any salty or bready surprises. Set this aside for a moment.
Now, in a larger bowl (or the bowl of your stand mixer), cream together the softened unsalted butter with both the granulated sugar and the packed light brown sugar. Beat on medium speed until the mixture is light, fluffy, and pale yellow. This creaming process incorporates air, which is vital for a tender cookie bar texture. This usually takes about 2-3 minutes. It should feel wonderfully smooth and aromatic.
Mix in Those Festive Goodies
Beat in the large eggs one at a time, mixing well after each addition. Then, stir in the fragrant vanilla extract. Scrape down the sides of the bowl to make sure everything is incorporated. Gradually add the dry ingredients to the wet ingredients, mixing on low speed (or by hand) just until combined. Be careful not to overmix at this stage; overmixing can lead to tough bars.
Press it In
Now for the fun part! Gently fold in your chosen festive add-ins. Think about the delightful textures and flavors each one brings – the festive jingle of sprinkles, the melty richness of chocolate, the tart burst of cranberries, or the nutty crunch of pecans. Incorporate them evenly throughout the dough.
Spoon half of the cookie dough mixture into your prepared 9×13 inch pan. Using lightly floured hands or the back of a spatula, press this layer evenly across the bottom of the pan. It should form a uniform base. Don’t worry if it’s not perfectly smooth; rustic charm is part of the appeal!
Bake to Golden Perfection
Spoon the remaining cookie dough mixture over the base layer. Again, use your hands or a spatula to gently spread and level this top layer as best as you can. It doesn’t need to be perfectly smooth, as imperfections add to the homemade charm.
Place the pan in the preheated oven and bake for 25-30 minutes, or until the edges are golden brown and the center is set and lightly golden as well. You want them baked through, but not dry. A toothpick inserted into the center should come out with moist crumbs attached, not wet batter.
Cool and Cut for Sharing
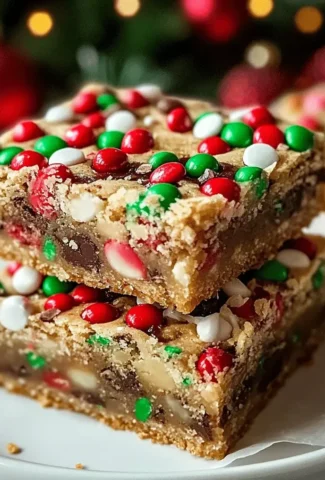
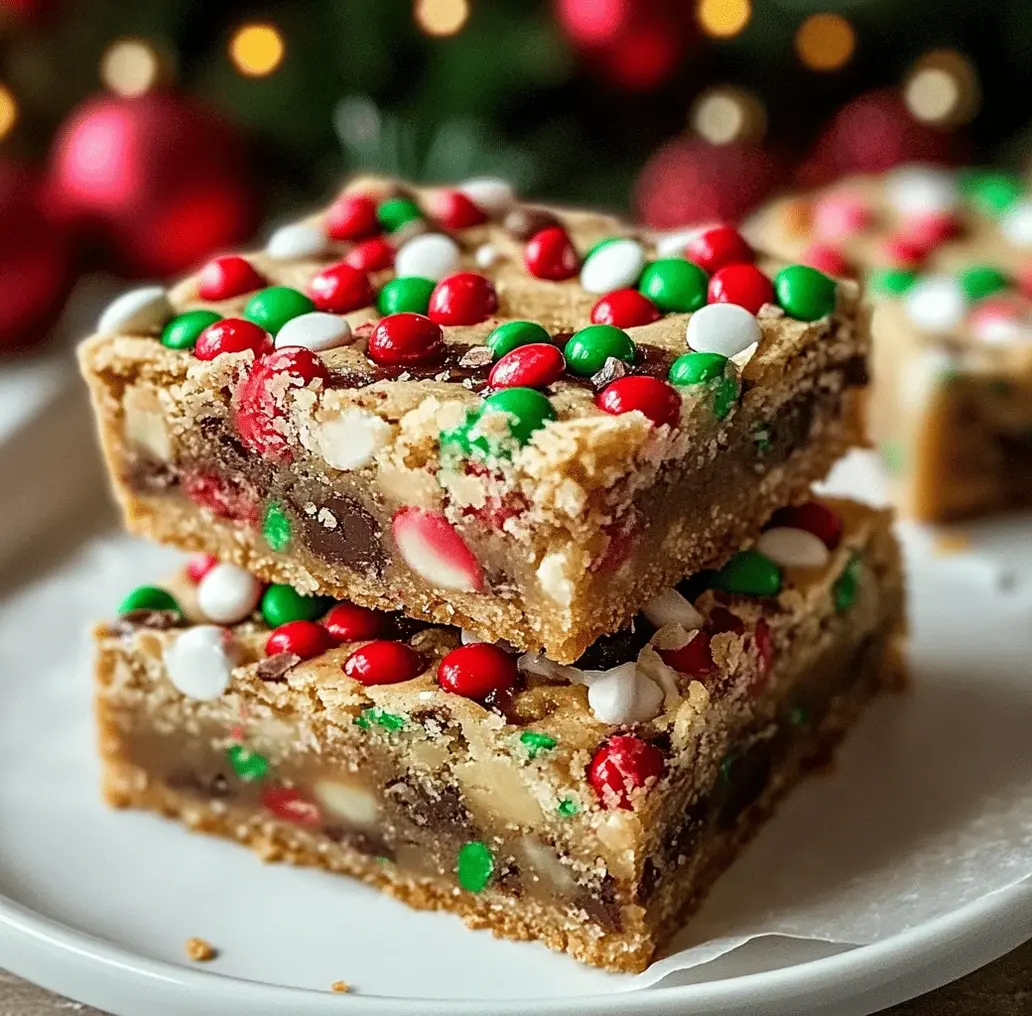
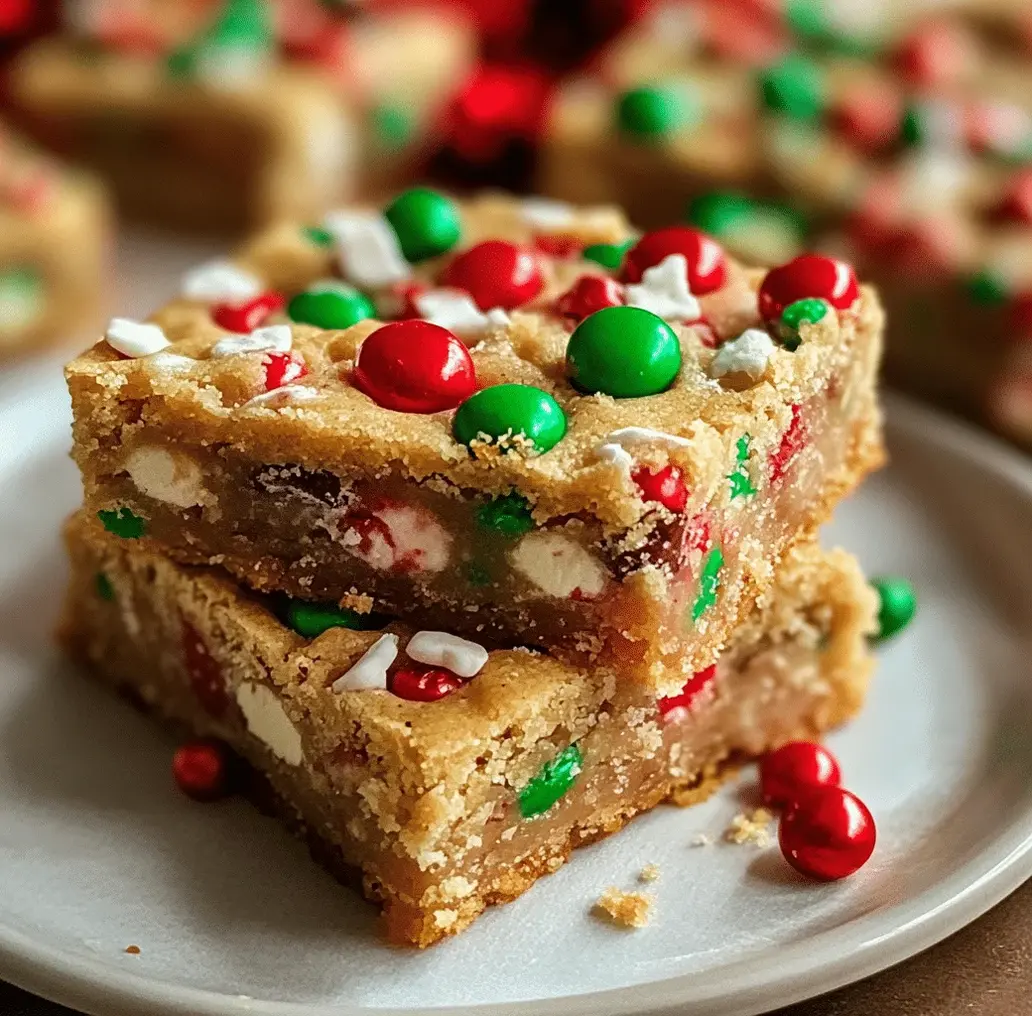
This is perhaps the hardest step – the waiting! Let the bars cool completely in the pan on a wire rack. This is crucial for them to set properly. Rushing this step will result in crumbly, soft bars that are difficult to cut cleanly. Once completely cool, use the parchment paper overhang to lift the entire slab out of the pan onto a cutting board. Then, using a sharp knife, cut into squares. These are typically cut into 2-inch squares, yielding about 24 bars.
Nutritional Information: A Sweet Look
While indulging in these festive treats is part of the holiday joy, understanding the approximate nutritional value can be helpful. Please note these are estimates and can vary based on specific ingredients and add-ins used.
- Calories: Approximately 200-250 per bar
- Fat: Approximately 10-13g
- Carbohydrates: Approximately 25-30g
- Sugar: Approximately 15-20g
- Protein: Approximately 2-3g
(Nutritional values are estimates and can vary based on ingredients and portion size.)
Healthier Alternatives for Guilt-Free Indulgence
Looking to make these holiday treats a little lighter without sacrificing flavor? Here are some simple swaps:
- Flour: Substitute half of the all-purpose flour with whole wheat pastry flour or almond flour for added fiber and nutrients.
- Butter: Use a plant-based butter alternative or unsweetened applesauce for half of the butter. Note that this may slightly alter the texture, making them a bit cakier.
- Sugar: Reduce the granulated sugar by ¼ cup and replace with a sugar substitute like erythritol or stevia blend, adjusting sweetness to taste. You can also use maple syrup or honey, but this will add moisture and affect baking time.
- Add-ins: Opt for dark chocolate chips (higher cocoa content usually means less sugar), skip the sprinkles if they are purely for visual appeal and sugar, or use unsweetened dried fruits sparingly.
Serving Suggestions: Elevate Your Treats
These bars are delicious on their own, but here are a few ways to make them even more special:
- With a Glass of Milk or Eggnog: A classic pairing that complements the sweetness perfectly.
- Drizzled with White Chocolate: Melt some white chocolate and drizzle it over the cooled bars for an extra touch of elegance and sweetness.
- Dusting of Powdered Sugar: A light dusting can resemble a snowy landscape, fitting for the season.
- Served with Coffee or Tea: A perfect accompaniment for an afternoon break.
Common Mistakes to Avoid
To ensure your Christmas cookie bars turn out perfectly every time, steer clear of these common pitfalls:
- Overmixing the Dough: This develops gluten too much, resulting in tough, dense bars. Mix until just combined.
- Using Cold Butter or Eggs: Properly softened butter and room temperature eggs are essential for achieving the correct batter consistency and texture.
- Not Cooling Completely Before Cutting: Patience is key! Warm bars will be crumbly and won’t hold their shape. Let them cool entirely in the pan.
- Overbaking: Keep an eye on your bars as they bake. Overbaking will lead to dry, hard cookie bars.
Storing Tips: Keep the Festivity Going
These delicious bars store beautifully, allowing you to enjoy them throughout the holiday season:
- At Room Temperature: Store cooled, uncut bars or cut squares in an airtight container at room temperature for up to 3-4 days. Placing parchment paper between layers can prevent sticking.
- Refrigeration: For longer storage (up to a week), or if your add-ins include ingredients that require refrigeration (like fresh cream cheese frosting, though not in this recipe), store in an airtight container in the refrigerator. Let them come to room temperature slightly before serving for optimal texture.
- Freezing: These bars freeze exceptionally well! Wrap individual bars or entire cooled slabs tightly in plastic wrap, then place in a freezer-safe bag or container. They can be frozen for up to 2-3 months. Thaw at room temperature.
Frequently Asked Questions About Christmas Cookie Bars
***Can I use salted butter instead of unsalted?***
Yes, you can, but you might want to reduce or omit the added salt in the recipe to avoid making the bars too salty. Taste your softened butter if possible; some salted butters are saltier than others.
***What are the best add-ins for Christmas cookie bars?***
The possibilities are endless! Classic combinations include white chocolate chips and red/green sprinkles, dried cranberries and pecans, or a mix of milk chocolate and peppermint chips. M&Ms also add a festive pop of color.
***How do I get clean cuts on cookie bars?***
The most important step is to let the bars cool completely. Use a long, sharp chef’s knife. Wiping the knife clean with a damp cloth between cuts can also help achieve neater edges.
***Can I make the dough ahead of time?***
Yes, you can prepare the dough and refrigerate it for up to 24-48 hours. Let it sit at room temperature for about 15-20 minutes to soften slightly before pressing into the pan.
***Why are my bars spreading too much?***
This is often due to melted butter or too much sugar. Ensure your butter is softened, not melted, and that you’re using the correct sugar measurements. Using parchment paper also helps contain the spread.
Conclusion: Bake Your Way to Holiday Cheer
This Delicious Christmas Cookie Bars Recipe is a testament to how simple ingredients and a straightforward method can yield incredibly festive and satisfying results. They are the perfect hands-off treat that embodies the spirit of the holidays – bringing joy, sweetness, and a touch of magic to your celebrations. So, gather your ingredients, put on your favorite holiday tunes, and whip up a batch. You and your loved ones will be so glad you did! Happy baking!
PrintDelicious Christmas Cookie Bars Recipe
Delightful festive bars that are easy to whip up and perfect for sharing during the holiday season!
Ingredients
- ½ cup(113g) unsalted butter
- 2 cups(400g) packed brown sugar
- 2large eggs
- 1 teaspoonvanilla extract
- ½ teaspoonsalt
- 1 teaspoonbaking powder
- 2 cups(248g) all-purpose flour
- 1 cupChristmas M&Ms or your favorite color
- ½ cupChristmas sprinkles (use jimmies for best results)
Instructions
- Begin by preheating your oven to 350°F (175°C). As the oven heats up, take your 9×13-inch metal baking pan and line it with aluminum foil. Make sure to leave some overhang on the sides so you can lift out the cookie bars easily once they’re baked. Don’t forget to spray the foil with a good layer of cooking spray. This is crucial to prevent them from sticking!
- In a mixing bowl, combine the softened unsalted butter and packed brown sugar. Using your stand mixer or hand mixer, beat together these ingredients until they form a crumbly mixture. This step is essential as it incorporates air into the butter, which helps to create a light and fluffy texture in your cookie bars.
- Next, add the two large eggs one at a time, followed by the teaspoon of vanilla extract. Continue mixing until you achieve a smooth and creamy batter. The eggs will help bind the ingredients together and add moisture to your cookie bars.
- Now it’s time to add the dry ingredients. Gradually mix in the salt and baking powder, ensuring they’re evenly distributed. Then, add the all-purpose flour and mix until just combined. It’s important not to over-mix at this stage, as it could make the cookie bars tough. Gently fold in the Christmas M&Ms and sprinkles for a festive touch!
- The mixture will be quite wet, so the best way to get it evenly distributed in the pan is by spraying your hands with cooking spray and using them to press down the dough gently. Make sure to smooth the surface evenly. For an extra splash of color, sprinkle some more M&Ms and sprinkles over the top of the dough.
- Place your baking pan in the oven and bake for about 22-25 minutes. Keep a close eye on them, as the goal is to allow them to turn a lovely golden color but not to over-bake. It’s better to err on the side of under-baked; they will continue to set as they cool down outside of the oven.
- Once baked, remove the pan from the oven and allow it to cool for a few minutes. Carefully lift the bars out using the foil overhang, then let them cool completely on a wire rack before slicing them into squares. This allows for clean cuts and a nice presentation.
Notes
For the best flavor, use room temperature butter and allow the bars to cool completely before slicing.
Nutrition
- Calories: 200 kcal per bar
- Protein: 2 g
“`
Leave a Reply