“`html
Table of Contents
- Festive Red Velvet Christmas Tree Cake
- Introduction: Your Holiday Showstopper
- Ingredients: The Heart of Your Festive Bake
- Timing: Precision for Perfection
- Step-by-Step Instructions: Crafting Your Christmas Masterpiece
- Nutritional Information: Guilt-Free Indulgence
- Healthier Alternatives: Indulge Wisely
- Serving Suggestions: Elevate Your Festive Spread
- Common Mistakes to Avoid
- Storing Tips: Keeping the Festivity Alive
- Frequently Asked Questions: Got Questions?
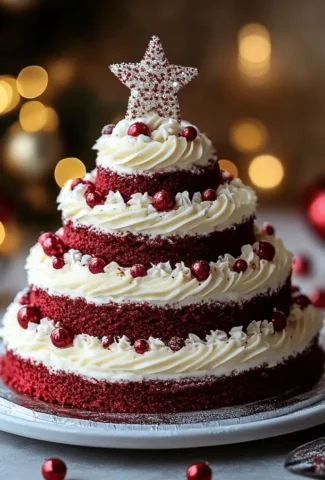
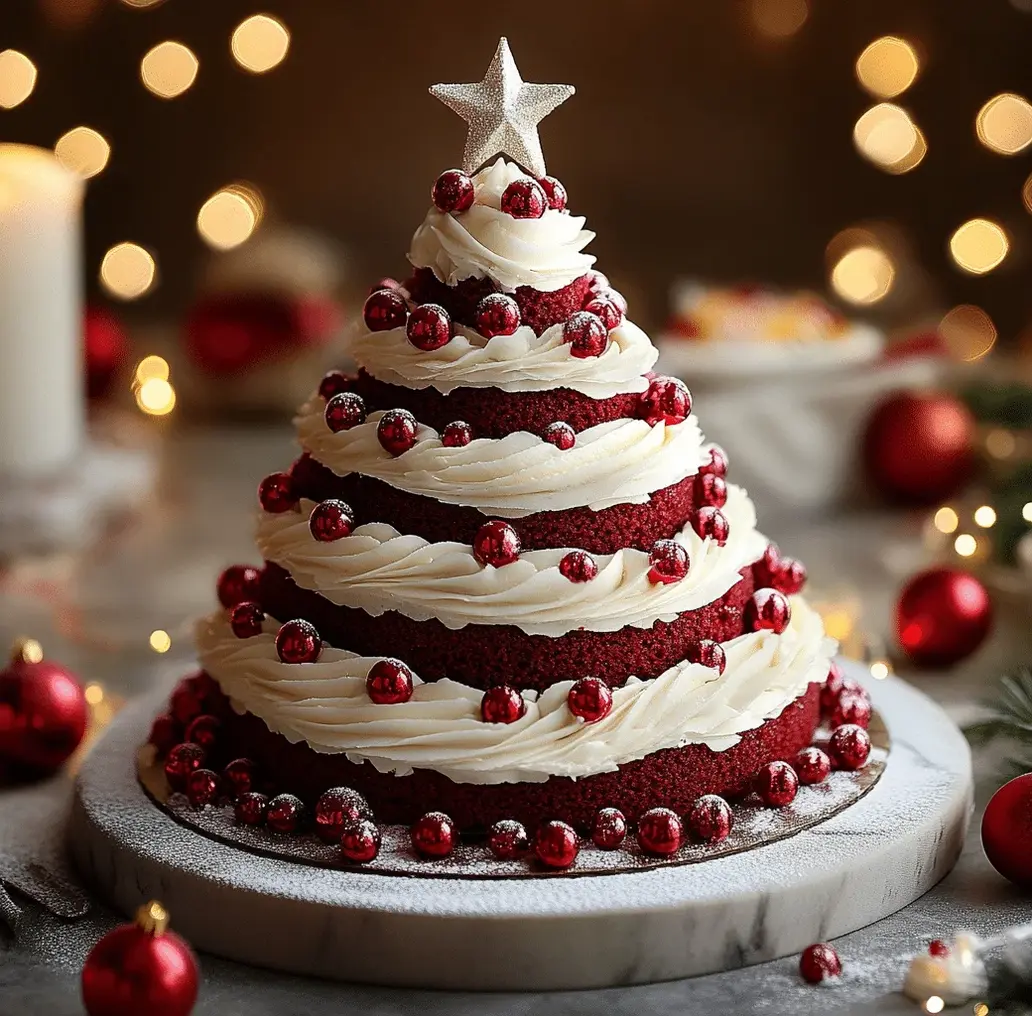
Festive Red Velvet Christmas Tree Cake
Introduction: Your Holiday Showstopper
Are you looking for a show-stopping dessert that screams “Christmas” and delights every single guest?
The holiday season is a time for joy, gatherings, and of course, delicious food. While gingerbread houses and fruitcakes have their charm, there’s something undeniably captivating about a beautifully decorated red velvet cake, especially when it’s shaped into a festive Christmas tree. This Festive Red Velvet Christmas Tree Cake is more than just a dessert; it’s a centerpiece, a conversation starter, and a delicious testament to the magic of the holidays. Imagine the gasps of delight as you unveil this masterpiece, a vibrant crimson tree adorned with snowy cream cheese frosting and sparkling edible embellishments. It’s perfect for adding that extra special touch to your Christmas Eve dinner, holiday party, or even as a festive bake sale item.
Why This Red Velvet Cake is a Christmas Must-Have
Red velvet cake holds a special place in many hearts, often associated with celebrations and indulgence. Its unique flavor profile, a delicate balance of cocoa, buttermilk tang, and subtle sweetness, is a delight on its own. When combined with the iconic tangy cream cheese frosting, it becomes an irresistible treat. But this recipe takes it a step further by transforming it into a stunning Christmas tree. The moist, tender crumb of the red velvet cake, achieved through simple ingredients and precise measurements, ensures a delightful eating experience. It’s visually striking with its deep red hue, making it a perfect canvas for festive decorations. This cake isn’t just about taste; it’s about creating a memorable visual experience that perfectly captures the spirit of Christmas.
Ingredients: The Heart of Your Festive Bake
The magic of a great red velvet cake lies in its ingredients. For this Christmas tree creation, we’re focusing on quality and flavor. Here’s what you’ll need:
For the Red Velvet Cake Layers:
- All-Purpose Flour: 3 cups, sifted. This forms the base of our cake, providing structure. (Substitution: Cake flour can be used for an even more tender crumb, but adjust by reducing quantity slightly if needed).
- Granulated Sugar: 2 cups. For sweetness and moisture.
- Unsweetened Cocoa Powder: 2 tablespoons. Adds a hint of chocolate and enhances the red color. Use a good quality Dutch-processed cocoa for a smoother flavor.
- Baking Soda: 1 teaspoon. Our primary leavening agent, which reacts with the acidic ingredients.
- Salt: 1 teaspoon. Enhances all the flavors.
- Large Eggs: 2, at room temperature. Bind, enrich, and provide structure. Room temperature eggs emulsify better.
- Vegetable Oil: 1 cup. Ensures a wonderfully moist and tender crumb. (Substitution: Canola oil or any neutral-flavored oil works well).
- Buttermilk: 1 cup, at room temperature. Essential for that classic red velvet tang and tender texture. The acidity activates the baking soda. (*See note below for DIY buttermilk*).
- Red Food Coloring: 2 tablespoons or more, for that vibrant festive color. Gel food coloring provides the best intensity without altering the batter consistency too much.
- White Vinegar: 1 teaspoon. Reacts with baking soda to create lift and enhance the red color.
- Vanilla Extract: 1 teaspoon. For a warm, sweet aroma and flavor.
For the Cream Cheese Frosting:
- Cream Cheese: 2 blocks (16 oz), softened. The star of the show, providing tangy richness. Ensure it’s full-fat and softened for a smooth frosting.
- Unsalted Butter: 1 cup (2 sticks), softened. Adds structure and a creamy mouthfeel to the frosting.
- Powdered Sugar (Confectioners’ Sugar): 4 cups, sifted. For sweetness and the perfect fluffy frosting consistency. Sifting prevents lumps.
- Vanilla Extract: 2 teaspoons. For that classic, comforting frosting flavor.
- Milk or Cream: 2-4 tablespoons, as needed. To reach your desired frosting consistency.
- Optional: A pinch of salt to balance the sweetness.
For Decoration:
- Edible glitter, silver or gold dragees, green sprinkles, or fresh cranberries for a festive touch.
DIY Buttermilk: If you don’t have buttermilk, you can make your own. Place 1 tablespoon of white vinegar or lemon juice in a liquid measuring cup, then add enough milk to reach the 1-cup line. Stir and let it sit for 5-10 minutes until it curdles slightly. It’s ready to use!
Timing: Precision for Perfection
Compared to an average cake recipe which might take 1.5-2 hours total, this tree cake requires a bit more time due to the multiple layers and decoration. However, the results are well worth the investment of your holiday cheer!

Step-by-Step Instructions: Crafting Your Christmas Masterpiece
Step 1: Preheat and Prepare
Begin by preheating your oven to 350°F (175°C). Grease and flour three 8-inch round cake pans. For extra insurance against sticking, you can also line the bottoms with parchment paper. This crucial step ensures your beautiful red velvet layers come out perfectly, ready for assembly.
Step 2: Whisk Up the Dry Magic
In a large bowl, whisk together the sifted all-purpose flour, granulated sugar, cocoa powder, baking soda, and salt. Whisking them together ensures that the leavening agents and salt are evenly distributed, preventing any off-tasting pockets in your cake. It also aerates the flour, contributing to a lighter cake.
Step 3: Cream the Wet Wonder
In a separate, medium-sized bowl, whisk together the vegetable oil and eggs until well combined. Then, stir in the buttermilk, red food coloring, white vinegar, and vanilla extract. The mixture will turn a vibrant, festive red. Don’t worry if it looks a little separated; the vinegar and buttermilk will work their magic!
Step 4: The Red Velvet Transformation
Gradually add the wet ingredients to the dry ingredients, mixing on low speed (or by hand) until just combined. Be careful not to overmix! Overmixing develops the gluten in the flour, which can lead to a tougher cake. A few small lumps are perfectly fine.
Step 5: Bake to Perfection
Divide the batter evenly among the three prepared cake pans. Bake for 30-35 minutes, or until a wooden skewer inserted into the center of the cakes comes out clean. The aroma filling your kitchen will be intoxicating!
Step 6: Cool Down and Prepare for Frosting
Once baked, let the cakes cool in their pans on a wire rack for about 10-15 minutes. Then, carefully invert them onto the wire rack to cool completely. It’s crucial that the cakes are entirely cool before frosting, otherwise, the frosting will melt, creating a messy disaster.
Step 7: The Creamy Dream Frosting
While the cakes are cooling, prepare the cream cheese frosting. In a large bowl, beat the softened cream cheese and softened butter together with an electric mixer until smooth and creamy. Gradually beat in the sifted powdered sugar, alternating with the milk or cream, until the frosting reaches your desired consistency. Beat in the vanilla extract and a pinch of salt if using. You want a frosting that’s spreadable but firm enough to hold its shape.
Step 8: Assemble Your Christmas Tree
Once the cakes are completely cool, it’s time to build your tree. From your three layers, cut out progressively smaller circles to create a tiered effect. You can use cake rings or even just freehand cut. The largest circle will be the base of your tree, the second layer will be placed on top, and the smallest layer will be the crown. Trim the sides of each layer to create a gentle slope from the bottom to the top, making it look more like a tree. Place the largest cake layer on your serving platter. Spread a generous amount of frosting over it, then carefully place the next largest layer on top. Repeat with the smallest layer. Frost the entire cake, smoothing the sides to create a cone or tree shape.
Step 9: Decorate and Dazzle
This is where the real festive fun begins! Use the remaining cream cheese frosting to pipe decorative elements like swirls, “ornaments,” or garland onto your tree cake. Edible glitter, silver dragees, or even a scattering of festive sprinkles can mimic fairy lights and tinsel. A star on top is a must! Let your creativity shine and make it uniquely yours.
Nutritional Information: Guilt-Free Indulgence
While exact nutritional values can vary based on specific ingredients and portion sizes, a typical slice of this Festive Red Velvet Christmas Tree Cake (assuming 12 servings) would generally contain:
- Calories: Approximately 450-550 kcal
- Protein: 5-7g
- Fat: 25-35g (with saturated fat depending on frosting)
- Carbohydrates: 50-65g
- Sugar: 35-45g
Healthier Alternatives: Indulge Wisely
Looking for ways to make this festive treat a little lighter without sacrificing flavor? Try these swaps:
- Reduced Sugar Frosting: Use a blend of full-fat cream cheese and Greek yogurt for frosting, and reduce the powdered sugar significantly. You can also explore natural sweeteners like stevia or erythritol, though they may affect texture and sweetness.
- Whole Wheat Flour: Substitute half of the all-purpose flour with whole wheat pastry flour for added fiber. Ensure it’s pastry flour to maintain tenderness.
- Less Oil: Consider replacing half of the vegetable oil with unsweetened applesauce. This can reduce fat content while adding moisture, though it might slightly alter the texture.
- Smaller Portions: The simplest way to enjoy this cake guilt-free is to serve smaller slices. It’s so rich and delicious, a small piece is often perfectly satisfying.
Serving Suggestions: Elevate Your Festive Spread
This cake is a star on its own, but here are a few ideas to make it even more special:
- With a Dollop of Cream: Serve a slice with a small dollop of lightly sweetened whipped cream or a drizzle of extra cream cheese frosting.
- Festive Accompaniments: Pair with fresh berries like raspberries or pomegranate seeds for a pop of color and tartness.
- Warm Beverages: Enjoy with a glass of mulled wine, hot chocolate, or a festive poinsettia cocktail.
- As a Dessert Buffet Star: Place it as the centerpiece of your dessert table, surrounded by cookies, chocolates, and other holiday treats.
Common Mistakes to Avoid
To ensure your Festive Red Velvet Christmas Tree Cake is an unqualified success, keep these common pitfalls in mind:
- Overmixing the Batter: This is the number one culprit for tough cakes. Mix only until ingredients are combined.
- Opening the Oven Door Too Early: This can cause the cake to collapse. Wait until the baking time is nearly complete before checking.
- Frosting Warm Cakes: Patience is key! Warm cakes will lead to melted, smudged frosting.
- Not Softening Butter and Cream Cheese for Frosting: Cold ingredients won’t cream properly, leading to a lumpy frosting.
- Under-baking or Over-baking: Use the skewer test. Too little time results in a gooey center; too much leads to a dry cake.
Storing Tips: Keeping the Festivity Alive
To keep your beautiful cake fresh and delicious:
- Room Temperature: The cake can be stored at room temperature, loosely covered, for up to 2 days. Ensure your kitchen isn’t too warm, as the cream cheese frosting can melt.
- Refrigeration: For longer storage (up to 4-5 days), refrigerate the cake. Let it come to room temperature for about 30 minutes before serving for the best flavor and texture.
- Freezing: It’s best not to freeze a frosted cake as the frosting can become grainy. If you must, freeze individual unfrosted layers, wrap them tightly, and thaw before frosting and decorating.
Frequently Asked Questions: Got Questions?
***Are there specific pans for making a Christmas tree cake?***
While you can certainly use standard round cake pans and cut them into a tree shape as described, there are also specific bundt pans shaped like Christmas trees available in baking stores, which can simplify the shaping process. However, the layered-and-cut method gives you more control over the height and design.
***Can I use gel food coloring instead of liquid?***
Yes, absolutely! Gel food coloring is highly recommended for red velvet cake as it provides a much more intense color with less product, preventing your batter from becoming too watery. Start with the recommended amount and add more until you achieve your desired vibrant red hue.
***My red velvet cake isn’t very red. What went wrong?***
Several factors can affect the redness: the quality of your cocoa powder (natural cocoa is less red than Dutch-processed), using too much cocoa, or an insufficient amount of red food coloring. Ensure your baking soda and vinegar have reacted properly, as this chemical reaction also contributes to the color.
***How do I get my cream cheese frosting smooth?***
Ensure your cream cheese and butter are fully softened (room temperature). Beat them together thoroughly until completely smooth before adding powdered sugar. Sifting the powdered sugar is also crucial to prevent lumps.
***Can I make the cake layers ahead of time?***
Yes! Baked and completely cooled cake layers can be wrapped tightly in plastic wrap and stored at room temperature for up to 2 days, or frozen for up to 2 months.
Ready to bake your own slice of Christmas magic? Let this Festive Red Velvet Christmas Tree Cake be the sweet star of your holiday table! Share your creations with us in the comments below and on social media – we’d love to see your festive masterpieces!
Festive Red Velvet Christmas Tree Cake Recipe

This Festive Red Velvet Christmas Tree Cake is perfect for your holiday celebrations, featuring moist red velvet layers with creamy frosting.
Ingredients
- For the Red Velvet Cake:
- 2½ cups(315g) all-purpose flour
- 2 tablespoonscocoa powder
- 1 teaspoonbaking soda
- ½ teaspoonsalt
- 1 cup(240ml) buttermilk
- 1 tablespoonwhite vinegar
- 2 teaspoonsvanilla extract
- 1 tablespoonred gel food coloring
- 1 cup(230g) unsalted butter, softened
- 1¾ cups(350g) granulated sugar
- 3large eggs
- For the Cream Cheese Frosting:
- 16 oz(450g) cream cheese, softened
- ½ cup(115g) unsalted butter, softened
- 4 cups(500g) powdered sugar, sifted
- 2 teaspoonsvanilla extract
- For Decoration:
- Edible red pearls or candy ornaments
- Crumbled red velvet cake scraps (for the base)
- Edible glitter or shimmer dust
- Star-shaped topper (optional)
Instructions
- Begin by preheating your oven to 350°F (175°C). While the oven heats, prep your three 8-inch round cake pans by greasing them generously with butter or non-stick spray, and lining the bottoms with parchment paper.
- In a large mixing bowl, combine the all-purpose flour, cocoa powder, baking soda, and salt. Set this bowl aside.
- In another bowl, mix the buttermilk, white vinegar, vanilla extract, and red food coloring. Whisk together until well-combined and set aside.
- In a large mixing bowl, cream together the softened butter and granulated sugar using a stand mixer or a hand mixer on medium speed. Gradually add in the eggs, one at a time, mixing well after each addition.
- Combine dry and wet ingredients with the butter mixture, alternating until both are fully incorporated.
- Evenly distribute the cake batter into the prepared pans. Bake for 25 to 30 minutes, or until a toothpick comes out clean. Cool in pans for 10 minutes before transferring to a wire rack.
- Prepare the cream cheese frosting by beating together the softened cream cheese and unsalted butter, gradually adding sifted powdered sugar until light and fluffy. Incorporate vanilla extract.
- Once the cakes are cooled, assemble the tree by stacking and frosting each layer, trimming the top layer as needed for a conical shape.
- Get creative with decorations by swirling frosting, pressing in edible pearls, and sprinkling edible glitter. Complete with a star-shaped topper.
Notes
Ensure your butter and cream cheese are at room temperature for the best mixing results. Store any leftover cake in an airtight container for up to three days.
Nutrition
- Calories: 500 kcal
- Protein: 5 g
“`
Leave a Reply