Table of Contents
- Intro to Easy Peanut Butter Balls with Cream Cheese
- Ingredients for Creamy Peanut Butter Balls
- Timing Your Peanut Butter Ball Creation
- How to Make Easy Peanut Butter Balls with Cream Cheese
- Nutritional Breakdown
- Healthier Swaps for Peanut Butter Balls
- Serving & Enjoying Your Peanut Butter Balls
- Avoiding Common Peanut Butter Ball Pitfalls
- Keeping Your Peanut Butter Balls Fresh
- The Sweet End to a Simple Recipe
- Frequently Asked Questions About Peanut Butter Balls
Easy Peanut Butter Balls Recipe with Cream Cheese
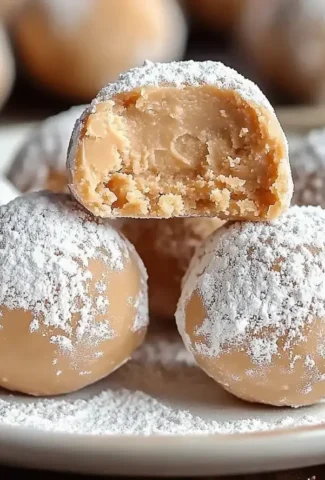
Craving a No-Bake Treat? You Need These Easy Peanut Butter Balls with Cream Cheese!
Are you spending hours scrolling through Pinterest searching for the perfect no-bake dessert that’s both incredibly easy and undeniably delicious? If so, you’re in the right place! This easy peanut butter balls recipe with cream cheese is a game-changer, requiring just three simple ingredients to create a creamy, decadent, melt-in-your-mouth treat. Forget complicated steps and lengthy baking times; these little spheres of joy are perfect for last-minute gatherings, a sweet afternoon pick-me-up, or just satisfying that persistent sweet tooth. This 3-ingredient wonder is often hailed as one of the easiest and most satisfying dessert recipes out there, and once you try it, you’ll understand why!
Ingredients for Creamy Peanut Butter Balls
The magic of this recipe lies in its simplicity. With just a few readily available ingredients, you’ll be well on your way to peanut butter bliss. The quality of your ingredients will shine through, so opting for good quality peanut butter and cream cheese will elevate these treats even further.
- Peanut Butter: 1 ½ cups (about 240g). For the best results and a smooth texture, use creamy, processed peanut butter. Natural peanut butter can sometimes separate, leading to a greasier texture, and ‘crunchy’ will affect the smooth consistency you’re aiming for. If you love a subtle salty hint, a regular salted peanut butter works perfectly.
- Substitution: If you have a peanut allergy or prefer a different nut butter, almond butter or cashew butter can be used, though the flavor profile will change.
- Cream Cheese: 4 oz (about 113g), softened. Full-fat cream cheese will give you the richest, creamiest texture. Make sure it’s truly softened to room temperature to ensure it blends smoothly with the peanut butter without lumps. Cold cream cheese is the enemy of smooth peanut butter balls!
- Substitution: While not ideal for this specific recipe’s texture, you could experiment with mascarpone cheese for a richer, slightly sweeter flavor, but it will alter the characteristic tang of cream cheese.
- Powdered Sugar: 2 cups (about 240g), plus more for dusting if desired. Powdered sugar, also known as confectioners’ sugar or icing sugar, is crucial for achieving the right consistency and sweetness. Sifting it can help prevent lumps and ensure a super smooth final product.
- Substitution: For a less sweet version, you can try reducing the powdered sugar slightly, but be aware this will affect the firming up of the balls.
- Optional Add-ins & Coatings:
- Melted chocolate (semi-sweet, dark, or milk) for dipping
- Chopped nuts, sprinkles, or sea salt for garnish
Timing Your Peanut Butter Ball Creation
One of the biggest draws of this recipe is how quickly it comes together. It’s a testament to the power of simple, no-bake desserts!
15 minutes
1 hour (total)
1 hour 15 minutes
Compared to many other cookie and ball recipes that require baking for 10-20 minutes plus cooling time, these peanut butter balls are significantly faster. The chilling times are essential for the dough to firm up enough to be rolled and to hold its shape after dipping, so they are non-negotiable for success.
How to Make Easy Peanut Butter Balls with Cream Cheese
This process is so straightforward, even the most novice bakers can achieve perfect results. Follow these simple steps, and you’ll have a batch of irresistible peanut butter balls in no time.
Step 1: Combine the Creamy Dream Team
In a medium-sized mixing bowl, add the softened cream cheese and the creamy peanut butter. Using an electric mixer (handheld or stand mixer with paddle attachment), beat these two ingredients together on medium speed until they are completely smooth, creamy, and well combined. Scrape down the sides of the bowl as needed to ensure everything is incorporated. This should take about 1-2 minutes. The mixture should be uniform in color and texture, with no streaks of either ingredient visible.
Step 2: Patience is a Virtue (and a Necessity for Rolling)
Now, it’s time to add the powdered sugar. Gradually add the sifted powdered sugar to the peanut butter and cream cheese mixture, mixing on low speed until just combined. Once all the powdered sugar is added, increase the speed to medium and beat until the mixture is thick and forms a dough-like consistency. It should be firm enough to handle. Cover the bowl tightly with plastic wrap or a lid and refrigerate for at least 30 minutes. This chilling step is crucial; it firms up the dough, making it much easier to roll into balls without it being sticky and messy.
Step 3: Roll into Perfect Spheres
Once the dough has chilled and firmed up, it’s time to get rolling! Line a baking sheet or a large plate with parchment paper or wax paper. Scoop out portions of the dough using a tablespoon or a small cookie scoop (about 1 to 1.5 inches in diameter). Roll the dough between the palms of your hands to form smooth, compact balls. Place the rolled balls onto the prepared baking sheet, ensuring they don’t touch each other initially. If the dough becomes too soft while you’re rolling, return it to the refrigerator for another 10-15 minutes.
Step 4: A Second Chill for Sturdiness
With all your peanut butter balls rolled and on the baking sheet, place the entire sheet back into the refrigerator for another 30 minutes. This second chill is vital, especially if you plan to dip them in chocolate. It ensures the balls are firm and cold, which prevents them from melting the chocolate when dipped and helps them hold their shape beautifully.
Step 5: Melt and Dip for Dazzling Results
While the balls are chilling for the second time, prepare your chocolate coating if you’re using it. You can melt semi-sweet chocolate chips, dark chocolate, or milk chocolate in a microwave-safe bowl in 30-second intervals, stirring between each, until smooth. Alternatively, melt using a double boiler. Once melted, you can add a teaspoon of coconut oil or vegetable oil to make the chocolate smoother and easier to dip with. For dipping, use a toothpick or a fork. Insert a toothpick into a chilled peanut butter ball, dip it into the melted chocolate, ensuring it’s fully coated, and let any excess drip off. Place the dipped ball back onto the parchment-lined baking sheet.
Pro Tip: For a cleaner dip, use a fork. Gently place the ball on the tines of the fork, dip into the chocolate, and then tap the fork gently on the side of the bowl to remove excess chocolate before transferring to parchment paper. You can also use a small spatula to help ease the ball off the fork.
Step 6: Let Them Set and Shine
Once dipped, let the chocolate set. You can leave them at room temperature if your kitchen is cool, or pop them back into the refrigerator for about 10-15 minutes until the chocolate is firm. If you’re adding any garnishes like sprinkles or chopped nuts, sprinkle them on immediately after dipping while the chocolate is still wet. For an extra touch of elegance, a sprinkle of flaky sea salt on top of dark chocolate-dipped balls is divine!
Nutritional Breakdown
While precise nutritional information can vary based on specific brands and portion sizes, here’s a general estimate per peanut butter ball (assuming 24 balls from the recipe, excluding chocolate coating):
- Calories: Approximately 120-150 kcal
- Fat: 8-10g
- Carbohydrates: 10-12g
- Sugar: 8-10g
- Protein: 3-4g
Note: If dipping in chocolate, calories and macros will increase significantly depending on the type and amount of chocolate used.
Healthier Swaps for Peanut Butter Balls
Looking to make these a little lighter on the scale without sacrificing all the flavor? Here are a few smart substitutions:
- Reduced Sugar Peanut Butter: Opt for a peanut butter with lower sugar content or one that doesn’t contain added sugars.
- Lower Fat Cream Cheese: While full-fat offers the best texture, light cream cheese can be used, though the final product might be slightly less rich.
- Natural Sweeteners: Instead of powdered sugar, you could experiment with a small amount of maple syrup or honey, but be mindful that these are liquid sweeteners and will affect the dough consistency, likely requiring more powdered ingredients to compensate and firm it up. This may alter the texture significantly.
- Dark Chocolate Coating: If dipping, choose dark chocolate with a higher cocoa percentage (70% or more), as it typically contains less sugar than milk or semi-sweet varieties.
- Portion Control: The simplest healthy alternative is to simply enjoy one or two smaller balls.
Serving & Enjoying Your Peanut Butter Balls
These peanut butter balls are incredibly versatile. Serve them:
- As a sweet bite after dinner.
- On a dessert platter for parties and potlucks.
- Packaged in small treat bags as edible gifts.
- Alongside a cup of coffee or tea for an afternoon treat.
- As part of a homemade candy selection during holidays.
Avoiding Common Peanut Butter Ball Pitfalls
To ensure your peanut butter balls turn out perfectly every time, be aware of these common mistakes:
- Using cold cream cheese: This is the number one culprit for lumpy dough. Always ensure your cream cheese is fully softened to room temperature.
- Not chilling the dough enough: Skipping or shortening the chilling time will result in a sticky, unmanageable dough that’s impossible to roll cleanly.
- Using natural peanut butter that has separated: While delicious, natural peanut butters can lead to a greasy texture. If you must use it, stir it thoroughly to re-emulsify.
- Overmixing after adding powdered sugar: Mix until just combined to avoid developing a tough texture.
- Dipping warm balls in chocolate: Cold balls are essential for a smooth, even chocolate coating that sets properly.
Keeping Your Peanut Butter Balls Fresh
Due to the cream cheese content, these peanut butter balls are best stored in the refrigerator. Place them in an airtight container. They will keep well for up to 1 week. If they are not dipped in chocolate, the surface might become slightly drier, but they will still be delicious. Chocolate-dipped versions tend to hold their texture better.
The Sweet End to a Simple Recipe
There you have it – incredibly easy peanut butter balls with cream cheese that are sure to impress! This recipe proves that you don’t need a long list of ingredients or complicated techniques to create a crowd-pleasing dessert. They’re perfect for any occasion, any time of year, and are especially delightful when you need a quick sweet fix. We hope you love these creamy, dreamy treats as much as we do!
Have you tried this easy peanut butter balls recipe? We’d love to hear about your experience! Share your thoughts, tips, or any creative variations in the comments below. And don’t forget to tag us on social media when you make these delicious treats – we love seeing them!
Frequently Asked Questions About Peanut Butter Balls
***Can I use crunchy peanut butter instead of creamy?***
While you *can* use crunchy peanut butter, it will alter the texture of the balls, making them less smooth and potentially adding a slightly gritty feel. For the classic creamy texture, creamy peanut butter is recommended.
***My dough is too sticky to roll. What did I do wrong?***
The most common reason for sticky dough is not chilling it sufficiently. Make sure to refrigerate the mixture for at least 30 minutes as instructed. If it’s still too soft, pop it back in the fridge for another 10-15 minutes. Ensuring your cream cheese was fully softened before mixing is also key.
***Can I omit the cream cheese?***
This recipe is specifically designed to use cream cheese for its distinct creamy texture and slight tang. Omitting it would fundamentally change the recipe, and you would need to find an entirely different recipe for peanut butter balls that doesn’t use cream cheese (often relying on butter, butter and oats, or just peanut butter and powdered sugar).
***How long do these last?***
Due to the cream cheese, these peanut butter balls should be stored in an airtight container in the refrigerator for up to one week.
***Can I freeze peanut butter balls?***
Yes, you can freeze them! Place them in a single layer on a baking sheet until firm, then transfer to a freezer-safe container or bag. They can be frozen for up to 2-3 months. Thaw them in the refrigerator before enjoying.
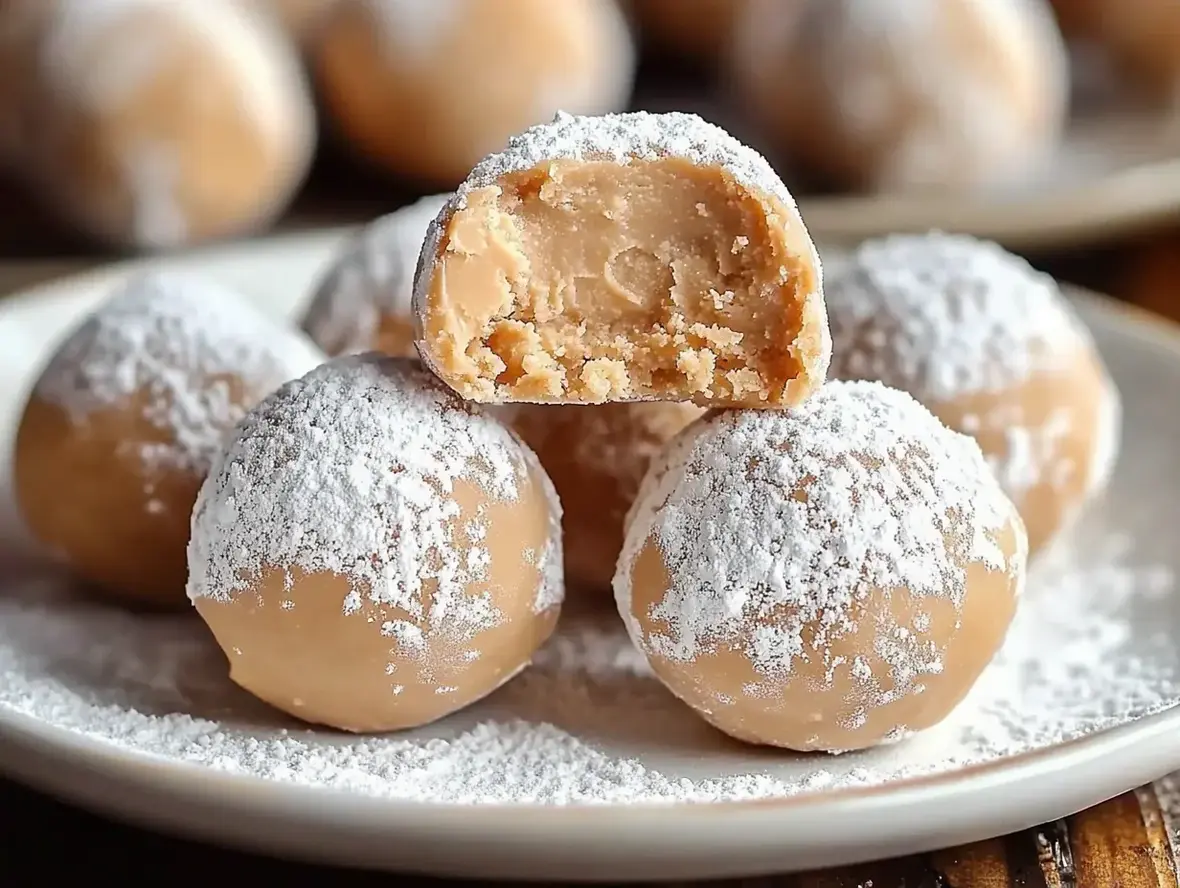
3-Ingredient Peanut Butter Balls
These creamy and indulgent peanut butter balls are incredibly easy to make with just three simple ingredients. Perfect as a no-bake treat for parties or snack time, they offer a delicious balance of nutty, sweet, and tangy flavors!
Ingredients
- 8 ozcream cheese, softened1 cupcreamy peanut butter1 cuppowdered sugar
- 1 cupcreamy peanut butter1 cuppowdered sugar
- 1 cuppowdered sugar
Instructions
- 1️⃣Mix the cream cheese and peanut butter
- In a medium mixing bowl, combine the softened cream cheese and peanut butter.Use a hand mixer or a sturdy spatula to blend until the mixture is smooth and creamy.2️⃣Incorporate the powdered sugarGradually add the powdered sugar to the mixture, stirring well after each addition.Continue mixing until the dough is thick and holds together. If the mixture feels too sticky, add a little more powdered sugar, one tablespoon at a time.3️⃣Shape and chillScoop out small portions of the dough and roll them into 1-inch balls using your hands or a small cookie scoop.Place the formed balls onto a baking sheet lined with parchment paper or wax paper.Refrigerate forat least 30 minutesto firm up before serving.
- Use a hand mixer or a sturdy spatula to blend until the mixture is smooth and creamy.2️⃣Incorporate the powdered sugarGradually add the powdered sugar to the mixture, stirring well after each addition.Continue mixing until the dough is thick and holds together. If the mixture feels too sticky, add a little more powdered sugar, one tablespoon at a time.3️⃣Shape and chillScoop out small portions of the dough and roll them into 1-inch balls using your hands or a small cookie scoop.Place the formed balls onto a baking sheet lined with parchment paper or wax paper.Refrigerate forat least 30 minutesto firm up before serving.
- 2️⃣Incorporate the powdered sugar
- Gradually add the powdered sugar to the mixture, stirring well after each addition.Continue mixing until the dough is thick and holds together. If the mixture feels too sticky, add a little more powdered sugar, one tablespoon at a time.3️⃣Shape and chillScoop out small portions of the dough and roll them into 1-inch balls using your hands or a small cookie scoop.Place the formed balls onto a baking sheet lined with parchment paper or wax paper.Refrigerate forat least 30 minutesto firm up before serving.
- Continue mixing until the dough is thick and holds together. If the mixture feels too sticky, add a little more powdered sugar, one tablespoon at a time.3️⃣Shape and chillScoop out small portions of the dough and roll them into 1-inch balls using your hands or a small cookie scoop.Place the formed balls onto a baking sheet lined with parchment paper or wax paper.Refrigerate forat least 30 minutesto firm up before serving.
- 3️⃣Shape and chill
- Scoop out small portions of the dough and roll them into 1-inch balls using your hands or a small cookie scoop.Place the formed balls onto a baking sheet lined with parchment paper or wax paper.Refrigerate forat least 30 minutesto firm up before serving.
- Place the formed balls onto a baking sheet lined with parchment paper or wax paper.Refrigerate forat least 30 minutesto firm up before serving.
- Refrigerate forat least 30 minutesto firm up before serving.
Notes
Storage: Store the peanut butter balls in an airtight container in the refrigerator for up to1 weekor in the freezer for up to3 months.Serving suggestion: Serve chilled for the best texture, but let them sit at room temperature for a few minutes if they’ve been in the freezer.
Serving suggestion: Serve chilled for the best texture, but let them sit at room temperature for a few minutes if they’ve been in the freezer.
Leave a Reply