“`html
Table of Contents
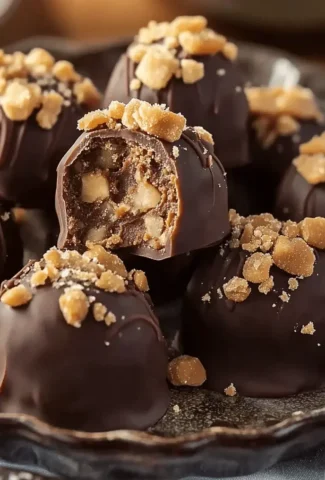
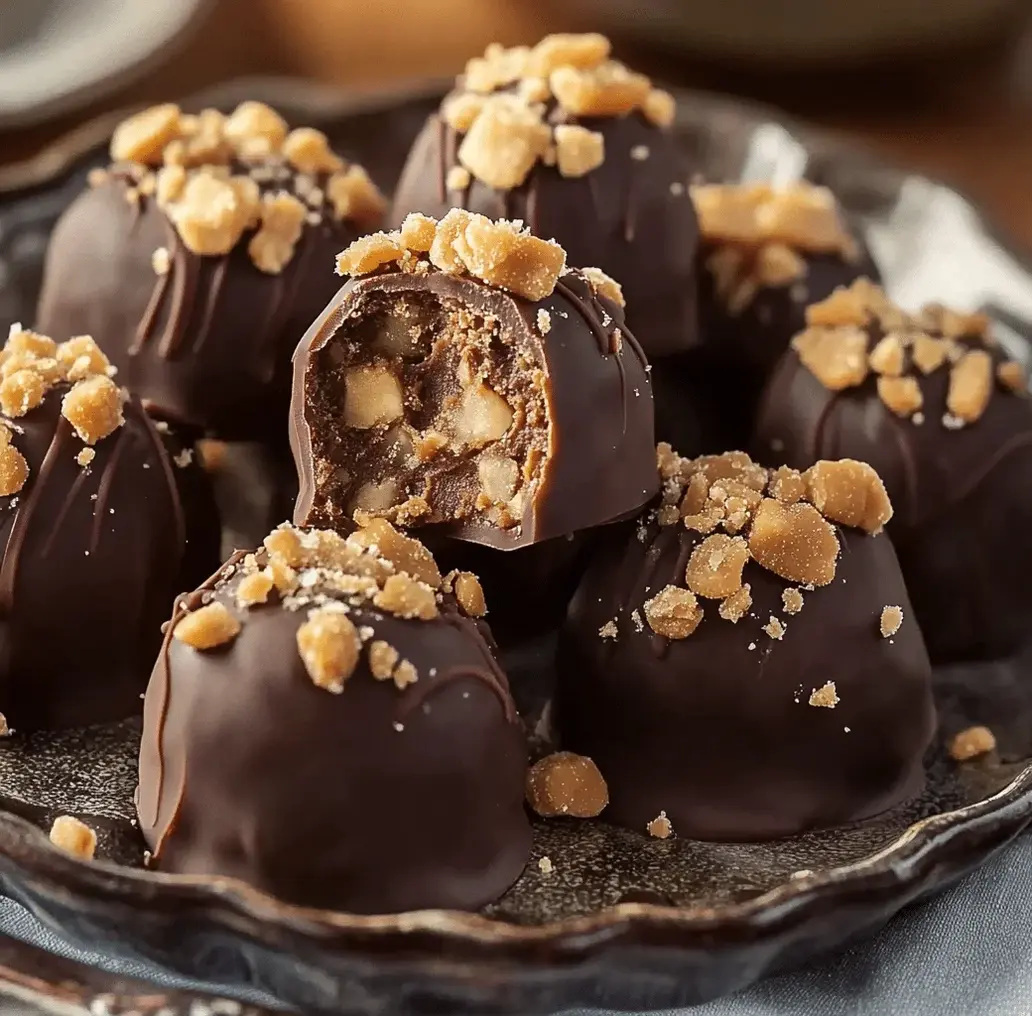
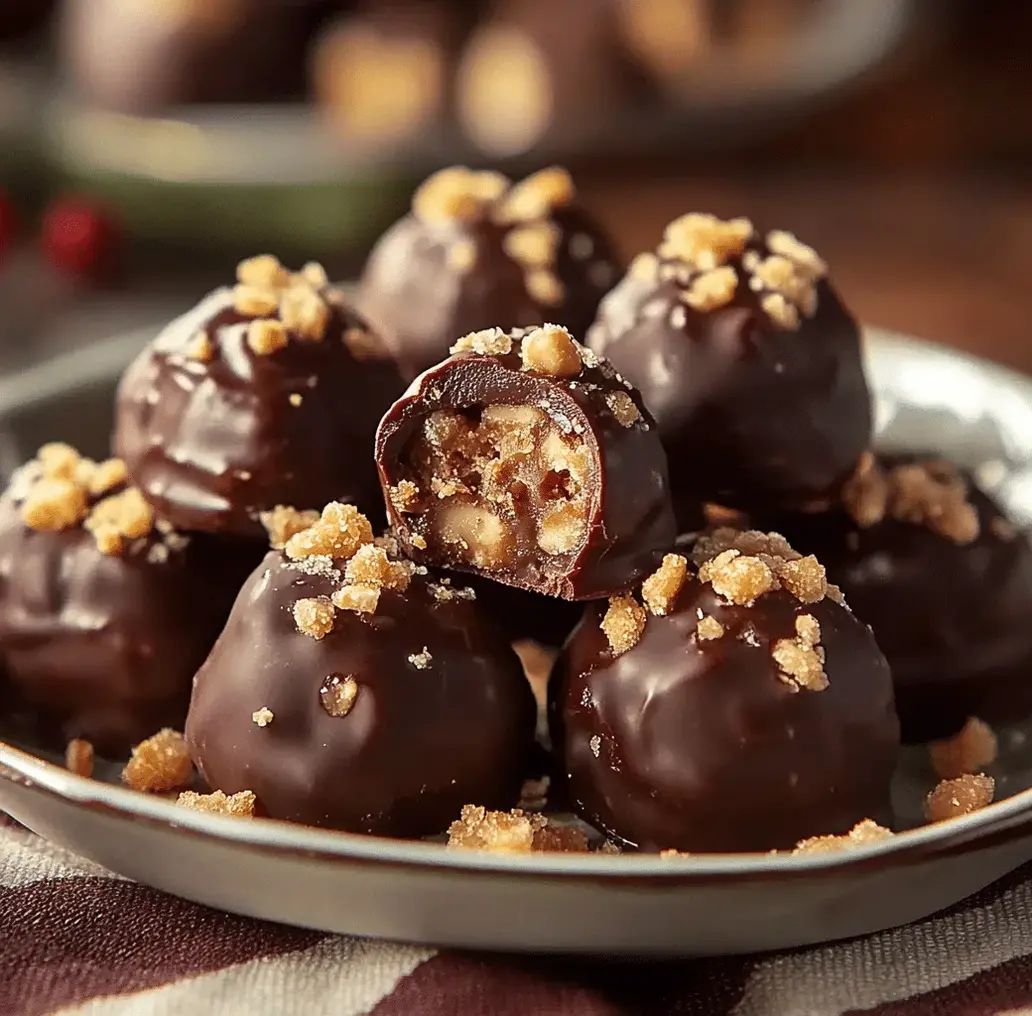
No-Bake Butterfinger Balls: Easy and Irresistible Treats
Why You’ll Love These No-Bake Butterfinger Balls
Are you constantly on the hunt for desserts that are both incredibly delicious and ridiculously easy to make? If your answer is a resounding yes, then you’re in the right place! In a world where baking can sometimes feel like a daunting task, especially after a long day, a sweet, crunchy treat combining familiar favorites like Butterfinger candy and rich chocolate is pure magic. These No-Bake Butterfinger Balls are not just a dessert; they’re a shortcut to happiness, requiring no oven time and minimal fuss. Imagine the satisfying crunch of a Butterfinger, perfectly blended with a creamy, chocolatey embrace, all in a bite-sized package. They’re the answer to your sweet cravings, a guaranteed crowd-pleaser for parties, a perfect after-school snack, or just a delightful treat to brighten any ordinary day.
Gather Your Sweet Supplies: Ingredients
The beauty of these Butterfinger balls lies in their simplicity. You likely have most of these ingredients hiding in your pantry already! Here’s what you’ll need:
- 1 cup (about 6-7 standard bars) Butterfinger candy bars, roughly chopped. The goal here is a mix of fine crumbs and small, delightful chunks for that irresistible crunchy texture. Think of it as controlled chaos!
- 8 ounces cream cheese, softened. This is the binder that brings everything together into luscious, rollable dough. Make sure it’s truly softened to room temperature for the smoothest mix.
- 1/2 cup creamy peanut butter. This adds a layer of nutty depth and richness that pairs exceptionally well with the Butterfinger’s unique flavor. Natural peanut butter might be a bit oily; if using, give it a good stir.
- 1 teaspoon vanilla extract. A tiny splash of vanilla enhances all the sweet flavors and adds a warm, comforting aroma.
- 1 cup semi-sweet chocolate chips. For dipping or drizzling, these lend a classic chocolatey finish that makes these balls truly decadent. You can use milk chocolate or dark chocolate if you prefer!
- 1 tablespoon coconut oil or vegetable shortening (optional, for smooth dipping). This helps thin out the chocolate chips, making for a silkier coating.
Time to Get Your Treat On: Timing
One of the biggest perks of this recipe is its speed. No waiting for ovens to preheat or cool down!
Compared to many traditional cookie or candy recipes that can take anywhere from 30 minutes to over an hour, these Butterfinger balls are a lightning-fast win, perfect for when that sweet craving strikes you unexpectedly.
Let’s Make Some Magic: Step-by-Step Instructions
Ready to whip up these irresistible treats? Grab your apron (or don’t – it’s that easy!) and let’s get started.
Step 1: Chop, Chop Goes the Butterfinger!
First things first, let’s get those Butterfinger bars prepped. Unwrap your candy bars and give them a good chop. Aim for a mix of very fine pieces (almost crumbs) and slightly larger bits. This texture is key to that signature Butterfinger crunch in every melt-in-your-mouth bite. You can use a sharp knife, a food processor on a pulse setting (be careful not to turn it into dust!), or even just a sturdy zip-top bag and a rolling pin for an old-school approach. Set aside about 1/4 cup of the larger chocolatey bits to mix in later if you like extra texture!
Step 2: Create the Luscious Base
In a large mixing bowl, combine the softened cream cheese, creamy peanut butter, and vanilla extract. Use an electric mixer (handheld or stand mixer with paddle attachment) to cream these ingredients together until they are smooth, well combined, and wonderfully fluffy. This is your creamy, dreamy foundation. Make sure there are no streaks of cream cheese or peanut butter left; a uniform texture is what we’re aiming for.
Step 3: Fold in the Goodness and Roll
Now, add the chopped Butterfinger pieces to the cream cheese mixture. Gently fold them in with a spatula or spoon until just combined. Don’t overmix at this stage! You want to retain that delightful crunch. The mixture will be thick and a little sticky, which is perfect. You can also fold in any reserved larger Butterfinger chunks here for extra texture.
Now, here comes the fun part: rolling! Lightly grease your hands or dust them with a little powdered sugar if they feel too sticky. Scoop about 1-2 tablespoons of the mixture at a time and roll it between your palms to form small balls, about 1 inch in diameter. Place the rolled balls onto a baking sheet lined with parchment paper. If the mixture is too soft to roll, pop it in the refrigerator for about 10-15 minutes to firm up slightly.
Step 4: Chill to Perfection (or Freeze for Speed!)
Once all your balls are rolled, it’s time to let them firm up. Place the baking sheet in the refrigerator for at least 30 minutes, or in the freezer for about 15-20 minutes. This step is crucial for making them easier to coat in chocolate and ensuring they hold their shape.
While the balls are chilling, prepare your chocolate for dipping. In a microwave-safe bowl, combine the semi-sweet chocolate chips with the optional coconut oil or shortening. Microwave in 30-second intervals, stirring well after each interval, until the chocolate is smooth and melted. Be careful not to overheat.
Once the Butterfinger balls are firm, use a toothpick or a fork to dip each ball into the melted chocolate, ensuring it’s fully coated. Let any excess chocolate drip off. Place the chocolate-dipped balls back onto the parchment-lined baking sheet. You can add a drizzle of contrasting chocolate (milk, white, or dark) over the top for extra flair before the chocolate sets, or sprinkle with a few extra crumbled Butterfinger pieces if you’re feeling fancy.
For an even quicker set, you can place the dipped balls back into the refrigerator or freezer for a few minutes until the chocolate coating is firm.
A Peek at the Goodness: Nutritional Information
While these are definitely a treat, it’s good to have an idea of what you’re indulging in. Please note these are approximate values per ball (assuming 24 balls per recipe, without chocolate coating and optional additions) and can vary based on exact ingredients used.
- Calories: Approximately 80-100 per ball
- Fat: Around 5-7g
- Carbohydrates: Around 7-9g
- Protein: Approximately 2-3g
- Sugar: Around 5-7g
These are delicious, but meant to be enjoyed in moderation as part of a balanced diet!
Sweet Swaps: Healthier Alternatives
Looking to make these a little lighter without sacrificing flavor? Here are a few ideas:
- Use whole wheat or oat flour: While this recipe is no-bake, for baked versions, consider using whole grain flours. For these balls, you could incorporate a tablespoon or two of finely ground rolled oats for a fiber boost, though it might alter the texture slightly.
- Reduced-fat cream cheese: Swap the full-fat cream cheese for a reduced-fat version. The texture might be slightly less rich, but it will still bind well.
- Dark chocolate: Opt for dark chocolate chips for dipping, which often contain less sugar and more antioxidants than milk or semi-sweet varieties.
- Natural peanut butter: If your Butterfinger bars are the main sugar source, using natural peanut butter (just peanuts and salt) can help reduce overall added sugars.
- Less candy, more whole foods: Consider reducing the amount of Butterfinger and adding in some finely chopped dates or dried cranberries for natural sweetness and fiber.
How to Serve Your Masterpieces
These no-bake Butterfinger balls are incredibly versatile!
- Party Perfection: Arrange them on a festive platter alongside other cookies and candies for a dessert buffet that’s sure to impress.
- Afternoon Delight: Pair one or two with your afternoon coffee or tea for a sweet, energizing pick-me-up.
- Potluck Powerhouse: They’re easy to transport and a guaranteed hit at any gathering.
- Kid-Friendly Fun: Let kids help roll the balls and decorate them for a fun kitchen activity.
- Dessert Topping: Crumble a few and use them to top ice cream, yogurt, or a slice of cheesecake!
Steer Clear of These Pitfalls: Common Mistakes
To ensure your Butterfinger balls turn out perfectly every time, watch out for these common slip-ups:
- Using Unsoftened Cream Cheese: This is the biggest culprit for a lumpy, unmanageable mixture. Ensure your cream cheese is at room temperature.
- Overmixing the Butterfinger: Folding in the chopped candy too vigorously can turn it into a mush, losing that delightful crunch you crave.
- Not Chilling Long Enough: If the mixture is too soft, it will be difficult to roll and might fall apart, especially before coating in chocolate.
- Overheating the Chocolate: Melted chocolate can seize up or burn easily. Use short intervals and stir frequently.
- Skipping the Coating Chill: If you try to eat them immediately after dipping, the chocolate might smudge or melt from the warmth of your hands.
Keep Them Scrumptious: Storing Your Treats
Thanks to the cream cheese, these treats need a bit of refrigeration to stay at their best.
- In the Refrigerator: Store your No-Bake Butterfinger Balls in an airtight container in the refrigerator for up to 5 days. The chocolate coating will help them stay fresh longer.
- Freezing for Later: You can also freeze these delicious balls! Place them in a single layer on a baking sheet until firm, then transfer to a freezer-safe container or zip-top bag. They’ll keep well for about 1-2 months. Thaw them in the refrigerator before enjoying.
Frequently Asked Questions (FAQs)
***Can I use other candy bars instead of Butterfinger?***
Absolutely! While Butterfinger provides its unique flavor and crunch, you could experiment with other crunchy, peanut-buttery, or chocolatey bars. Snickers, Kit Kats, or even crushed Oreos could work, though they will result in a different flavor profile.
***Do I have to dip them in chocolate?***
No, you don’t have to! If you’re short on time or prefer a less decadent treat, you can certainly skip the chocolate coating. They will still be delicious with just the creamy Butterfinger mixture.
***Can I make these vegan?***
This recipe relies heavily on dairy products (cream cheese and potentially the candy bar itself, depending on the brand and Butterfinger recipe). Making them truly vegan would require significant substitutions, such as vegan cream cheese, vegan butter, and ensuring your chosen candy bar is vegan-friendly, which might be difficult as Butterfinger is not typically vegan.
***Why are my balls falling apart?***
This usually happens if the cream cheese and peanut butter weren’t mixed smoothly, or if the mixture isn’t chilled sufficiently before rolling. Ensure your cream cheese is softened and well-incorporated, and don’t skip the chilling steps!
Satisfy Your Craving in Minutes!
There you have it – the easiest, most satisfying way to channel your love for Butterfinger into a delightful, no-bake treat. These balls are a no-fail recipe that’s perfect for snack emergencies, spontaneous gatherings, or simply treating yourself after a long day. The combination of creamy, crunchy, and chocolatey goodness is simply irresistible. Give them a try and discover your new favorite quick dessert!
What are you waiting for? Gather your ingredients and whip up a batch of these no-bake Butterfinger balls today! Let us know in the comments below how yours turned out, or share your favorite variation!
No-Bake Butterfinger Balls: Easy and Irresistible Treats

A sweet, crunchy treat combining Butterfinger candy and chocolate.
Ingredients
- 2 cupscrushed Butterfinger candy bars
- 1 cupcrushed graham crackers
- 1 cupcreamy peanut butter
- 1 cuppowdered sugar
- 1 cupsemi-sweet chocolate chips
- 1 teaspooncoconut oil
- Optional Substitutions:
- Replace graham crackers with crushed digestive biscuits for a different texture.
- Use almond or sunflower butter for a nut-free alternative.
- Swap semi-sweet chocolate chips with milk or dark chocolate according to your preference.
Instructions
- In a large bowl, begin by mixing together the crushed Butterfinger candy bars, crushed graham crackers, creamy peanut butter, and powdered sugar. Use a sturdy spatula or wooden spoon to combine the ingredients until you achieve a smooth, cohesive mixture. This will be the foundation for the delightful balls.
- Once your mixture is well combined, it’s time to shape your treats. Using a teaspoon or a small scoop, take a portion of the mixture and roll it firmly in your hands to form bite-sized balls. As you shape, be mindful that the consistency should hold well without crumbling. Place each ball onto a parchment-lined baking sheet for easy transfer to the freezer.
- To make coating easier and achieve the desired firmness, place the rolled balls in the freezer for about 30 minutes. This step is crucial as it helps the mixture set nicely, ensuring your treats maintain their shape when fully coated.
- While the balls are chilling, prepare the chocolate coating. In a microwave-safe bowl, combine the semi-sweet chocolate chips with the coconut oil. Microwave them in increments of 20 seconds, stirring in between, until the chocolate is fully melted and smooth. This method ensures that the chocolate doesn’t burn while heating.
- Once your balls have set in the freezer, remove them and dip each one into the melted chocolate. Use a fork or skewer to immerse them fully, allowing any excess chocolate to drip off back into the bowl. Make sure they are evenly coated for a beautiful finish!
- Place the chocolate-coated balls back on the parchment-lined baking sheet. Now, let them sit at room temperature or pop them back into the refrigerator for about 15 minutes until the chocolate has set and hardened up nicely. This brief cooling period ensures a perfect bite when you’re ready to indulge!
Notes
Make sure the balls are shaped firmly to prevent them from falling apart during coating.
Nutrition
- Calories: Approximately 200 per ball
- Protein: 5 g
“`
Leave a Reply