Table of Contents
Cheesy Garlic Chicken Wraps Creamy Garlic Cheese Fusion – Quick & Tasty
When I first moved to Manhattan from Casablanca, I found myself craving the comforting warmth of my mother’s tagine and the lively crunch of New York street food. That’s why I created the Cheesy Garlic Chicken Wraps – a creamy, garlicky twist on a classic street snack that could be tossed in a pan or plated on a plate. The unique angle of blending Mediterranean herbs with a French-style cheese mousse gives it a luxurious mouthfeel that will transport you from the souks of Marrakech to the alleys of Greenwich Village.
The fragrant steam of sautéed garlic rises as the butter melts, mingling with the subtle sweetness of the tomato‑sun dried lemon zest that I infuse into the cheese blend. As the chicken warms, its savory juices marry the gooey mozzarella and tangy sour cream, creating a rich mosaic of textures – silky cream, crunchy tortilla, and a whisper of crisped edges. The final golden surface is dusted with fresh parsley, offering a burst of green against the golden cheese, and the aroma closes the sensory circle with a hint of Moroccan cumin.
What sets this version apart is the dual‑cheese mousse that I whipped up on the fly with cream cheese and sour cream, which instantly transforms ordinary shredded chicken into a velvety filling. I’ve tested this in my NYC kitchen countless times, and it always comes out with a fluffy interior and a caramelized crust. A common mistake is over‑cooking the wrap, which dries out the cheese. Keep an eye on the skillet and lift when the cheese melts; the wrap should release easily, not stick.
Why This Cheesy Garlic Chicken Wraps Recipe Is the Best
The key to the flavor secret is the marriage of optional Italian seasoning with traditional Moroccan cumin and a splash of lemon zest. I introduced that harmonious Blend by taking a sniff of my grandfather’s spice jar in Casablanca and then fine‑tuning it against the tang of a French demerara drizzle. The result feels at once rustic and refined, making it ideal for a quick weeknight dinner or a fancy potluck mix‑up.
Perfected texture comes from the cooking technique I inherited from my culinary school in Paris – the quick sear in melted butter that locks in moisture before dulling into the cheese mousse. The tortilla’s surface gets a light char, creating a satisfying crunch that complements the creamy center, and the final press in the pan guarantees a firm grip with each bite.
Foolproof & Fast – I’ve seasoned this recipe so beginners can slice, stir, and roll with confidence. Even novice cooks can follow the four‑step process and have a sinfully delicious wrap lined up for the family in just 25 minutes. I always remind readers to keep the cheese mixture cold; this prevents it from dripping off the tortillas.
Cheesy Garlic Chicken Wraps Ingredients
I always grab the freshest ingredients at the Union Square Greenmarket to keep the wraps bursting with real flavors. Picture a plate of creamy mozzarella that just melted off your kitchen counter in a Parisian kitchen, and add a modest handful of fresh parsley I pick from the Mediterranean fountain that sits next to my baking station in Queens.
Ingredients List
- 2 cups cooked chicken (shredded or diced)
- 1 ½ cups shredded mozzarella or cheddar cheese
- ¼ cup cream cheese (softened)
- 2 tbsp butter (melted)
- 3 cloves garlic (minced)
- ¼ cup sour cream
- 1 tsp garlic powder
- 1 tsp Italian seasoning
- 4 large tortillas
- Salt and pepper (to taste)
- Fresh parsley (for garnish, optional)
Ingredient Spotlight
Cream cheese – the base for my cheese mousse – should be at room temperature so it blends smoothly with sour cream. The soft crumb of Irish cream cheese gives the wrap a richer taste than standard U.S. varieties; however, a regular store brand works just as well if kept slightly softened.
Sour cream – it adds tang and keeps the mixture from becoming too thick. If you need a lighter option, Greek yogurt will substitute with a similar level of tang but a narrower fiber.
Mozzarella – choose a fresh, low-moisture mozzarella to avoid the wrap becoming greasy. The classic French “où fume” cheeses add a delicate umami that is unmistakably herby.
| Original Ingredient | Best Substitution | Flavor / Texture Impact |
|---|---|---|
| Cream Cheese | Mascarpone (for a sweeter flavor) | Silky, mildly sweet; less salty |
| Sour Cream | Greek Yogurt | Thicker, tangier; adds protein |
| Mozzarella | Cheddar (sharp) or Gouda | Richer sharpness; slightly crisper after melting |
How to Make Cheesy Garlic Chicken Wraps — Step-by-Step
Keep calm, set your skillet to medium, and let the aroma start the good work.
Step 1: Sauté Garlic
Melt 2 tablespoons of butter in a medium skillet over medium heat. Add 3 minced cloves of garlic and sauté 1–2 minutes until fragrant but not browned, about 30‑45 seconds per side.
💡 Samantha’s Pro Tip: Using a fine‑mesh sieve to pre‑sift garlic before mincing helps avoid clumps and ensures a uniform flavor.
Step 2: Heat Chicken
Add the cooked chicken to the skillet. Season with 1 tsp garlic powder, 1 tsp Italian seasoning, salt, and pepper. Stir until evenly coated and lightly browned, 2–3 minutes. The chicken should be warm but not dry.
⚠️ Common Mistake to Avoid: Over‑cooking the chicken will make the wrap dry. Use a knife to check moisture; the center should look steaming.
Step 3: Mix Cheeses
In a bowl, combine ¼ cup softened cream cheese, ¼ cup sour cream, and ¾ cup shredded mozzarella or cheddar. Blend until smooth and creamy. The consistency should be pourable but thick enough to coat the chicken.
💡 Samantha’s Pro Tip: Let the cheese at room temp for 10 minutes, or slide it into the fridge for 5 minutes, then whisk with a fork or hand mixer.
Step 4: Combine Chicken & Cheese Mixtures
Remove the skillet from heat. Pour the cheese mixture into the pan with chicken. Stir until fully blended; the chicken should be coated in a glossy, cheesy sauce.
⚠️ Common Mistake to Avoid: Mixing too late will cause the cheese to stick to the pan; stir promptly.
Step 5: Assemble Wraps
Lay out 4 tortillas. Divide the chicken mixture evenly in the center of each. Sprinkle remaining ¾ cup shredded cheese on top, then fold sides inward and roll tightly.
💡 Samantha’s Pro Tip: Use a paper towel to press a tiny bit of oil on the mold of your hand – it prevents sticking when forming the roll.
Step 6: Cook Wraps
Heat a clean skillet or grill pan over medium heat. Place seam‑side down and cook 2–3 minutes per side until golden brown and cheese melts. Flip gently with a spatula and press down slightly.
⚠️ Common Mistake to Avoid: Letting the wrap sit too long after removing from heat can cause the cheese to over‑melt and the tortilla to tear.
| Step | Action | Duration | Key Visual Cue |
|---|---|---|---|
| 1 | Sauté garlic in butter | 1–2 min | Golden garlic, not brown |
| 2 | Heat chicken with spices | 2–3 min | Chicken steaming, lightly browned |
| 3 | Whisk cheese blend | 1 min | Smooth, creamy mix |
| 4 | Combine chicken & cheese | 30 sec | Uniform coating |
| 5 | Assemble wraps | 3–4 min | Even filling distribution |
| 6 | Cook wraps to golden | 2–3 min each side | Golden crust, cheese bubbly |
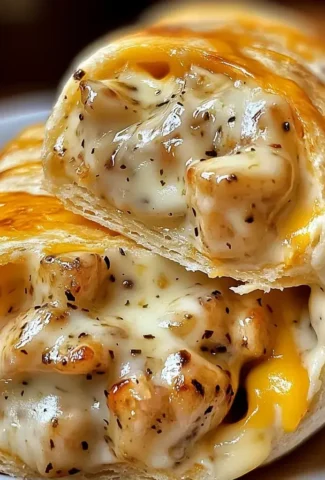
Serving & Presentation
Cut each wrap in half diagonally to reveal a star‑shaped center of velvety cheese. Arrange them on a white marble platter you’ve seen in my grandmother’s kitchen, letting the golden edges glisten. Scatter fresh parsley and a dash of smoked paprika to echo the Moroccan heat.
Pair the wraps with a chilled glass of rosé from the local Brooklyn vineyard, a light Caesar salad, or a fresh cucumber and tomato salsa. The bright acidity contrasts the creamy cheese, while the herby finish mirrors the Italian seasoning used in the filling.
| Pairing Type | Suggestions | Why It Works |
|---|---|---|
| Side Dish | Fresh quinoa pilaf, Caesar salad | Light, crunchy contrast to creamy wrap |
| Sauce / Dip | Hummus, cilantro yogurt | Adds moisture and herbaceous depth |
| Beverage | Rosé, sparkling water | Acidity cuts through cheese |
| Garnish | Microgreens, fresh basil leaves | Color and freshness uplift |
Make-Ahead, Storage & Reheating
I love prepping these wraps on my Sunday, then sealing them in airtight zip‑top bags and keeping them in the fridge for up to 3 days. If you’re craving a lunch later, just pop a fresh wrap in the microwave for 30‑60 seconds. The taste remains indulgent, thanks to the cheese mousse keeping the center moist.
| Method | Container | Duration | Reheating Tip |
|---|---|---|---|
| Refrigerator | Zip‑top bag | Up to 3 days | Microwave 30 s or grill 2 min per side |
| Freezer | Aluminum foil wrap | Up to 2 months | Thaw 12 h, then bake 15 min at 350 °F |
| Make‑Ahead | Individual bowls | Up to 2 days in fridge | Assemble right before eating, or microwave 1 min |
When reheating a pre‑made wrap, I always place it on a pre‑heated skillet with a splash of butter to re‑crisp the tortilla. This gives a satisfying snap that reminds me of a well‑seared tagine crust.
Variations & Easy Swaps
| Variation | Key Change | Best For | Difficulty Impact |
|---|---|---|---|
| Mediterranean Herb Crust | Top wraps with crumbled feta, olives, oregano | Classic Mediterranean flavor | None |
| Gluten‑Free / Dairy‑Free Option | Use corn tortillas & lactose‑free cheese | Allergy friendly | Moderate (requires different hand‑roll technique) |
| Summer Berry Twist | Add strawberry compote & goat cheese | Sweet & tangy summer palate | Easy |
Mediterranean Herb Crust
Elevate the wrap by incorporating crumbled feta, kalamata olives, and a sprinkle of dried oregano atop the cheese layer before sealing. The nutty salt of olives and the salty tang of feta combine with fresh basil to echo the aromatic street corners of Marrakech.
Gluten‑Free / Dairy‑Free Option
Swap the large flour tortillas for corn‑based or certified gluten‑free tortillas, and use a lactose‑free mozzarella equivalent such as Swiss or a nutrient‑dense vegan cheese. The texture stays gooey and the bite remains unchanged, but the wrap becomes inclusive for dietary needs.
Summer Berry Twist
Replace sour cream with a thin layer of goat cheese, and fold in a spoonful of strawberry compote made from fresh peaches harvested at the city’s farmers market. The sweet berry undertone pairs surprisingly well with the savory chicken core, giving a vibrant summer feel.
How long can I store cooked wraps?
I keep my wraps in airtight zip‑top bags and they stay fresh for up to three days in the refrigerator. For longer storage, wrap them individually in foil and freeze; thaw over night and re‑heat in the skillet or bake at 350°F for 15 minutes. The key is to avoid excess moisture so the tortilla stays crisp.
What are the best ways to reheat chicken wraps?
To revive a chilled wrap, triangle it and set in a hot skillet with a teaspoon of butter for one minute per side. The butter adds a crisp finish and helps melt any residual cheese. If using a microwave, cover with a paper towel and heat at 50% power for 45 seconds to keep the cheese from drying out.
Can I use turkey instead of chicken?
Yes, roasted or deli turkey works nicely. It has a milder flavor, so I recommend seasoning it with a pinch more garlic powder and a dash of smoked paprika to give it extra depth. Just make sure the turkey is shredded finely so the cheese can coat it evenly.
How do I keep the wrap from falling apart?
Pack the filling snug but not packed; it should slide onto the tortilla without sticking. After rolling, seal the seam with a small amount of melted butter and press down gently. A brief reheating in the pan crisps the tortilla, give the wrap stability, and seals the edges into a firm bite.
What kind of cheese works best for the mixture?
The classic combo of mozzarella with a short‑stand of cheddar gives a creamy, melty base with a sharp kick. If you want a richer, buttery taste, swap the mozzarella for a creamy fontina or an aged gouda. Keep the cheese at room temperature before mixing for a smooth, lump‑free texture.
Is the recipe suitable for a quick breakfast?
Absolutely! The wrap is crunchy and packed with protein, making it perfect for a fast brunch on the go. Use a whole‑wheat tortilla for extra fiber, and add a handful of spinach to integrate a veggie boost. The buttery garlic flavor wakes the senses early in the morning.
Can I make this vegetarian?
For a vegetarian version, replace the chicken with grilled portobello mushroom caps or chickpeas. The mushrooms lend a meaty texture while the chickpeas provide plant‑based protein. Season them with the same garlic powder and Italian blend to keep the flavor profile consistent.
What’s a good side for these wraps?
A crisp cucumber salad with red onion, a drizzle of olive oil, and a splash of lemon juice offers a refreshing contrast. The acidity cuts through the richness of the cheese, and the raw crunch balances the warm, soft center of the wrap. For a vegetarian option, a handful of mixed greens tossed in a vinaigrette works beautifully.
How can I make the cheese mixture lighter?
Swap half of the cream cheese for Greek yogurt or silken tofu. This lowers the fat content while maintaining creaminess. Be sure to whisk thoroughly to avoid lumpiness. The result is a lighter wrap that still delivers the same satisfying melt.
What’s a quick cleanup trick after cooking?
Before you start, lay a sheet of parchment paper on your skillet to catch splatters. After cooking, pour the remaining butter or oil into a small container and let it cool; you can then swirl it into a small pot and use it for reheating. This way your pan stays clean and you preserve the buttery flavor for future dishes.
Share Your Version!
I’d love to hear how you tweak the recipe! Drop a star rating and leave a comment below. Share a photo of your wraps on Instagram or Pinterest, tag @mykitchenstorie, and tell me which part of the recipe you loved most. If you’ve tried the gluten‑free swap, let me know how it turned out!
From my NYC kitchen to yours — I hope this recipe brings as much warmth to your table as it does to mine. — Samantha 🧡
Love This Recipe? Save It to Pinterest!
If you enjoyed this Cheesy Garlic Chicken Wraps recipe, don’t let it get lost in your browser tabs! 😄 Pin it now so you can find it again anytime — and explore hundreds more tried‑and‑tested recipes waiting for you on my Pinterest boards.
👉 Follow Samantha on Pinterest @chefrecipes2
📌 Pin this recipe · 🔁 Re-pin your favorites · 💬 Tag me when you make it — I love seeing your creations!
Got a question or a twist on this wrap? Drop me a line and let’s chat! Feel free to share your own version or ask for menu pairings. I’m eager to hear your feedback and keep this culinary conversation flowing.
Cheesy Garlic Chicken Wraps

Ingredients
- 2 cups cooked chicken (shredded or diced)
- 1 ½ cups shredded mozzarella or cheddar cheese
- ¼ cup cream cheese (softened)
- 2 tbsp butter (melted)
- 3 cloves garlic (minced)
- ¼ cup sour cream
- 1 tsp garlic powder
- 1 tsp Italian seasoning
- 4 large tortillas
- Salt and pepper (to taste)
- Fresh parsley (for garnish, optional)
Instructions
- Sauté Garlic:
- In a skillet, melt the butter over medium heat. Add the minced garlic and sauté for 1-2 minutes until it becomes fragrant.
- Tip: Be careful not to burn the garlic as it will turn bitter.
- Heat Chicken:
- Add the cooked chicken to the skillet. Season with garlic powder, Italian seasoning, salt, and pepper. Stir well to coat the chicken evenly and heat through.
- Tip: Use leftover rotisserie chicken for added flavor and convenience.
- Mix Cheeses:
- In a bowl, combine the softened cream cheese, sour cream, and half of the shredded cheese. Mix until smooth.
- Tip: Ensure the cream cheese is softened for easy mixing.
- Combine Chicken and Cheese Mixtures:
- Remove the skillet from heat. Add the chicken to the cream cheese mixture and stir until fully combined.
- Assemble Wraps:
- Lay out the tortillas and divide the chicken mixture evenly in the center of each. Sprinkle the remaining shredded cheese on top. Fold the sides of each tortilla over the filling and roll tightly into wraps.
- Cook Wraps:
- Heat a clean skillet or grill pan over medium heat. Place the wraps seam-side down and cook for 2-3 minutes per side, until golden brown and the cheese is melted.
- Tip: Press down gently with a spatula for even browning and to help seal the wraps.
Leave a Reply