Table of Contents
Classic Peanut Butter Cookies with a Twist – Irresistibly Soft and Chewy
Growing up in Morocco, my mother always had a way of turning simple ingredients into delectable treats. One of my favorites was her version of cookies flavored with nutty aromas, which now reminds me of my Classic Peanut Butter Cookies. This easy recipe turns ordinary peanut butter into something truly special, combining soft, chewy textures with the right balance of sweetness. The magic lies not just in the peanut butter — it’s in the care you give while making them.
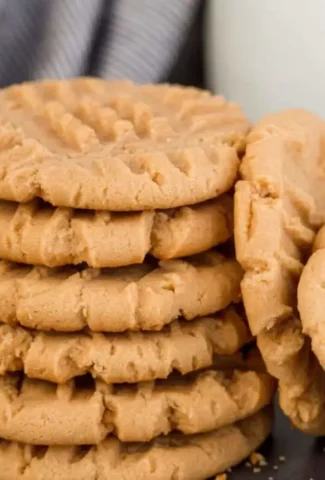
Imagine biting into a freshly baked cookie, warm and inviting, the peanut butter hugs your taste buds, while the sugar creates that gentle crisp on the edge. The moment your oven releases the rich aroma, you’ll be whisked away to a cozy corner of a Parisian bistro. Using good quality peanut butter, you’ll discover that each cookie bursts with flavor, making them not just cookies, but a delightful experience.
With my training in culinary school, I’ve perfected this recipe for irresistible peanut butter cookies. My secret? It’s all about the technique and the ingredients. I’ll share a pro tip that elevates these cookies with that extra bit of tenderness and deliciousness, plus a common mistake that can happen if you’re not careful while mixing. I promise these cookies will become a go-to for any occasion!
Why This Classic Peanut Butter Cookies Recipe Is the Best
The secret to these cookies is the quality of peanut butter you use. Opt for a natural, creamy variety that doesn’t contain added sugars or hydrogenated oils. This not only allows for a clean flavor but also adds to the ultimate texture that melts in your mouth, reminiscent of those Moroccan sweets I miss so much.
When it comes to achieving the perfect texture, be sure to cream the butter and sugars thoroughly. Your cookies will have just the right amount of chewiness, with a slight golden edge that melts in your mouth. The baking soda and powder create that perfectly soft interior, while the flour lends necessary structure, making each bite balanced.
Most importantly, these cookies are quick and straightforward to prepare. In less than 20 minutes, you’ll have fresh cookies ready for your friends or family. This recipe is beginner-friendly, making it a fun baking adventure for everyone!
Classic Peanut Butter Cookies Ingredients
Finding the right ingredients in the hustle of NYC is thrilling! You can find the best unsalted butter and creamy peanut butter at local markets or specialty stores. Trust me, these small touches make a big difference in your cookie’s flavor and texture.
Ingredients List
- 1/2 cup unsalted butter (room temperature)
- 2/3 cup granulated sugar
- 1/3 cup brown sugar
- 2/3 cup peanut butter
- 1 large egg
- ¾ tsp baking powder
- ½ tsp baking soda
- ¼ tsp salt
- 1 1/3 cup all-purpose flour
Ingredient Spotlight
Unsalted butter is crucial for the rich, creamy base of these cookies. When selecting, go for high-quality brands for the best flavor. If you’re in a pinch, you can substitute it with coconut oil for a slightly unique twist, though it will yield a different texture.
Granulated sugar provides the necessary sweetness and contributes to the cookie’s structure. It’s best to use fine granulated sugar. You can substitute it with coconut sugar, which will add a hint of caramel flavor but can change the color and texture of the final product.
Peanut butter is the star of the show! Choose a natural, creamy variety without added sugars. If you need an alternative, almond butter works wonderfully and gives a different yet delicious flavor profile. Be aware that the cookies may be a touch drier than with peanut butter.
| Original Ingredient | Best Substitution | Flavor / Texture Impact |
|---|---|---|
| Unsalted Butter | Coconut Oil | Slightly denser texture |
| Granulated Sugar | Coconut Sugar | Hint of caramel flavor |
| Peanut Butter | Almond Butter | Different flavor profile, drier cookies |
How to Make Classic Peanut Butter Cookies — Step-by-Step
Baking these cookies is a rewarding experience that fills your kitchen with warmth and delicious smells. Let’s get started!
Step 1: Preheat the Oven
Preheat your oven to 350°F. Line 2 large baking sheets with parchment paper for easy cleanup.
💡 Samantha’s Pro Tip: Ensure the oven is fully preheated to get that golden color on your cookies!
Step 2: Cream the Mixture
In a mixing bowl, use an electric hand mixer to cream together the room temperature butter, granulated sugar, and brown sugar until light and fluffy. This should take about 2-3 minutes.
⚠️ Common Mistake to Avoid: Don’t skip the creaming step! This is crucial for the texture.
Step 3: Add Peanut Butter and Egg
Add the peanut butter and the egg to the butter and sugar mixture, then mix until everything is combined smoothly.
💡 Samantha’s Pro Tip: Using room temperature eggs helps them blend more easily.
Step 4: Mix Dry Ingredients
In a separate bowl, sift together baking powder, baking soda, salt, and flour. Gradually add it to the wet mixture, mixing until just combined.
⚠️ Common Mistake to Avoid: Overmixing can result in tough cookies!
Step 5: Form the Dough
Using your hands, form the dough into 1-inch balls. Space the balls about 3 inches apart on the baking sheets.
💡 Samantha’s Pro Tip: If the dough is too sticky, refrigerate for 10 minutes before shaping!
Step 6: Flatten the Cookies
Flatten each ball in a crisscross pattern using a fork. This creates that signature look!
⚠️ Common Mistake to Avoid: Be gentle — too much pressure will flatten them too much!
Step 7: Bake the Cookies
Bake in the preheated oven for 8-9 minutes until the edges are just starting to turn golden brown. The cookies will look slightly underdone.
💡 Samantha’s Pro Tip: Remove them from the oven while they still look soft; they will firm up as they cool!
Step 8: Cool on a Rack
Allow the cookies to cool for about 5 minutes on the baking sheets, then transfer them to a wire rack to cool completely.
⚠️ Common Mistake to Avoid: Skipping the cooling time can lead to crumbly cookies!
| Step | Action | Duration | Key Visual Cue |
|---|---|---|---|
| 1 | Preheat the Oven | 5 mins | Oven indicator on |
| 2 | Cream the Mixture | 2-3 mins | Light and fluffy |
| 3 | Add Peanut Butter and Egg | 1 min | Smooth mixture |
| 4 | Mix Dry Ingredients | 2 mins | Just combined |
| 5 | Form the Dough | 2 mins | Balls formed |
| 6 | Flatten the Cookies | 2 mins | Fork crisscross |
| 7 | Bake the Cookies | 8-9 mins | Golden edges |
| 8 | Cool on a Rack | 5 mins | Soft, set edges |
Serving & Presentation
Serving these cookies is a delight! I love stacking them on a pretty plate, perhaps with a drizzle of dark chocolate or a dusting of powdered sugar for a touch of elegance. Incorporate a small bowl of warm chocolate or milk for dunking, so your guests feel pampered.
Traditionally, these cookies are delicious on their own, but if you’re in the mood to impress, pair them with a creamy vanilla ice cream scoop. The contrast of flavors and textures creates a delightful experience, reminiscent of enjoying a sophisticated pastry in a vibrant NYC café.
| Pairing Type | Suggestions | Why It Works |
|---|---|---|
| Side Dish | Fresh Berries, Sliced Apples | Bright acidity complements sweetness |
| Sauce / Dip | Chocolate Sauce, Nutella | Rich and creamy texture adds depth |
| Beverage | Milk, Coffee, Herbal Tea | Enhances flavors and balances richness |
| Garnish | Chopped Nuts, Sea Salt | Adds textures and visual appeal |
Make-Ahead, Storage & Reheating
These cookies are wonderful to make ahead, allowing you to enjoy fresh treats throughout the week. I recommend preparing the dough and chilling it in the refrigerator; this makes the cookies even better when baked later!
| Method | Container | Duration | Reheating Tip |
|---|---|---|---|
| Refrigerator | Airtight Container | 5 days | Warm briefly in the microwave |
| Freezer | Freezer Bag | 3 months | Thaw in the fridge overnight |
| Make-Ahead | Refrigerator | 2 days in advance | Bake directly from chilled |
When reheating, I find that microwaving them for about 10 seconds revives their original chewy texture. Instant delight after a long day of cooking is something I always aim for!
Variations & Easy Swaps
| Variation | Key Change | Best For | Difficulty Impact |
|---|---|---|---|
| Chocolate Chip Peanut Butter Cookies | Add chocolate chips | Chocoholics | No change |
| Gluten-Free Cookies | Use almond flour | Gluten-Free Diets | A bit challenging |
| Peanut Butter and Jamboree | Fill with jam | Creative Play with Flavors | Easy |
Chocolate Chip Peanut Butter Cookies
For those who want a decadent option, simply add semi-sweet chocolate chips to the dough before baking. Their melt-in-your-mouth sensation when combined with peanut butter is heavenly and reminiscent of both French pastries and Moroccan delights.
Gluten-Free Cookies
To cater to gluten-free folks, replace the all-purpose flour with almond flour. This swap gives the cookies a nutty flavor and slightly denser texture, perfect for those with dietary restrictions.
Peanut Butter and Jamboree
For a fun twist, try filling the cookies with your favorite jam or preserve. This combination mimics the beloved peanut butter and jelly sandwiches, adding a burst of flavor in every bite!
Can I use natural peanut butter for these cookies?
Yes, using natural peanut butter is not only acceptable but recommended! It adds a rich flavor to the cookies. Just ensure it’s well-stirred to avoid an oily mess, and you’ll enjoy a delightful taste that’s hard to resist!
How should I store these cookies to keep them fresh?
To maintain their freshness, store the cookies in an airtight container at room temperature for up to a week. If you want to keep them longer, freezing them in a labeled container is a great option. They can last up to three months frozen!
Why did my cookies spread too much while baking?
Cookies that spread excessively can occur if the dough is too warm or if improper measurements were used. It’s crucial to thoroughly chill your dough if it’s sticky, and measure your ingredients accurately for the best results.
Can I make these cookies vegan?
Absolutely! You can replace the egg with a flaxseed egg (1 tablespoon ground flaxseed mixed with 3 tablespoons of water, then let it sit for 5 minutes). Use coconut oil instead of butter, and you’ll have a delicious vegan version!
What can I pair these cookies with to enhance their flavor?
These cookies pair wonderfully with a chilled glass of milk, herbal tea, or coffee! For a fun twist, you could try a scoop of vanilla ice cream or even a spread of nutella. These pairings create a perfect balance of flavors!
Share Your Version!
I’d love to hear how your peanut butter cookies turn out! Leave a star rating and comment below with any variations you try. If you share a photo on Instagram or Pinterest, tag @mykitchenstorie so I can see your delicious creations!
From my NYC kitchen to yours — I hope this recipe brings as much warmth to your table as it does to mine. — Samantha 🧡
Love This Recipe? Save It to Pinterest!
If you enjoyed this Classic Peanut Butter Cookies recipe, don’t let it get lost in your browser tabs! 😄 Pin it now so you can find it again anytime — and explore hundreds more tried-and-tested recipes waiting for you on my Pinterest boards.
👉 Follow Samantha on Pinterest @exorecipe
📌 Pin this recipe · 🔁 Re-pin your favorites · 💬 Tag me when you make it — I love seeing your creations!
Classic Peanut Butter Cookies
The easiest recipe for homemade peanut butter cookies. Soft and irresistibly delicious cookies with peanut butter flavor.
Ingredients
- 1/2 cup unsalted butter (room temperature)
- 2/3 cup granulated sugar
- 1/3 cup brown sugar
- 2/3 cup peanut butter
- 1 large egg
- ¾ tsp baking powder
- ½ tsp baking soda
- ¼ tsp salt
- 1 1/3 cup all-purpose flour
Instructions
- Preheat the oven to 350°F. Line 2 large baking sheets with parchment paper.
- With an electric hand mixer, cream together the butter, granulated sugar, and brown sugar. Add the peanut butter and egg and mix until combined.
- In a separate bowl, add baking powder, baking soda, salt, and flour (sift flour once measured). Add to the peanut butter mixture, mix until combined.
- Form dough into 1" balls. Place the balls about 3-inches apart on the prepared baking sheet. Flatten in a crisscross pattern using a fork.
- Bake 8-9 minutes until cookies just start to turn golden at the base. Remove from the oven and allow cookies to cool 5 minutes then transfer on a wire rack.
Leave a Reply