Table of Contents
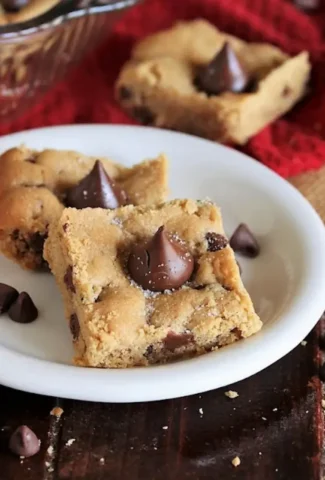
Peanut Butter Blossom Bars Bar Form Delight with Molten Hershey’s Kisses
Growing up in Morocco, I learned early about the power of simple flavors; the hearty sweetness of a good cookie can turn any day brighter. Back in New York, I’ve found a way to transform that classic Peanut Butter Blossom cookie into a bar that’s easier to make, easier to store, and still packed with that signature cozy vanilla‑to‑chocolate bite. With these Peanut Butter Blossom Bars, you get the same nostalgic crunch and molten Hershey’s Kisses—just distributed on a flat, convenient shape that feels at home in your pantry.
When you bake these, the scent of butter and peanut butter mingles with the deep sweet of milk chocolate chips. The crust is golden‑brown and slightly crunchy, while the interior stays chewy and buttery. The moment a Hershey’s Kiss smolders against the hot dough, a sheet of chocolate glaze forms—giving the bars that signature “blossom” look while keeping every bite moist. It’s a satisfying blend of textures that makes the bars a perfect “just‑key‑in‑one” sweet treat for kids, commuters, or the person who simply loves peanut butter.
This recipe is my take on the original line item, setting the hunger high but staying shockingly simple: no fancy mixers, no extra lumps, just a few well‑planned steps to get the delicious melt in each bar. I’ll share a tidy tip later on how to keep the kisses from flattening, and I’ll point out one common mistake that most bakers foul up—namely, not pressing the dough firmly before baking.
Why This Peanut Butter Blossom Bars Recipe Is the Best
The secret to staying true to that iconic flavor is my technique of “steaming” the butter and sugars before adding the dry. This creates a light, airy crumb that lets the chocolate kiss melt into a glossy glaze without sinking. My Parisian pastry schooling taught me the importance of equilibrium—perfectly tempered fats paired with the right amount of dry heat.
The perfect texture is achieved by letting the dough sit at room temperature while the pan is preheated, then pressing it in a 9×13 pan to a uniform depth. A firm pressure makes the bars hold their shape, so each bite is as crisp around the edges as it is soft inside. I’ve tested this step in my food market kitchen and found it keeps the layers from separating after cooling.
Because it is so straightforward, I say “no more than eight bites” and “no need for a stand mixer.” With a disposable cookie sheet, you save prep time and cleanup. Even a first‑time baker will feel the confidence that they’re producing a bakery‑quality bar that tastes as wonderful as the original assortment.
Peanut Butter Blossom Bars Ingredients
I grab these on a weekend stroll through Chelsea Market, where a vendor sells creamy peanut butter that’s smoother than a French patisserie butter, and I pick up Hershey’s Kisses that still hold their shape after a quick press. The flour comes from Trader Joe’s – it’s light enough and gives the bars a nice crumb.
Ingredients List
- ½ c. unsalted butter, softened
- ½ c. granulated sugar
- ½ c. brown sugar
- ½ c. creamy peanut butter
- 1 egg
- 1 ½ c. all‑purpose flour
- ¾ tsp. baking soda
- ½ tsp. baking powder
- ⅛ tsp. salt
- ⅔ c. milk chocolate chips
- 24 Hershey’s Kisses, unwrapped
- 3 tsp. white sparkling sugar OR granulated sugar
Ingredient Spotlight
Butter: The quality of butter dictates how fluffy the crumb becomes. I always choose an airy olive‑oil butter from Whole Foods that softens evenly without becoming greasy. If you’re vegan, coconut oil works well, though it might be slightly sweeter.
Peanut Butter: This classic vote‑of‑convenience ingredient must be natural, no added sugar. If you’re allergic, almond butter is a fine substitute—just keep the ratio the same and watch for a lighter, slightly nutty flavor.
Hershey’s Kisses: These are the star. My partner recommended using the regular yellow wrappers so they melt slightly but keep their essence. Non‑pareil chocolate kisses are a fun change for a sharper profile, but the classic shape remains.
| Original Ingredient | Best Substitution | Flavor / Texture Impact |
|---|---|---|
| Unsalted Butter | Coconut Oil (solid) | Slight coconut undertone and buttery softness. |
| Creamy Peanut Butter | Almond Butter | Lighter nutty profile; less sweet. |
| Hershey’s Kisses | Non‑pareil Chocolate Kisses | Sharper chocolate, still glistening. |
How to Make Peanut Butter Blossom Bars — Step-by-Step
Let’s get this delicious sheet going: first, darken your kitchen with the sweet aroma of butter and peanut butter.
Step 1: Mix Butter, Sugar and Peanut Butter
In a large bowl, combine the softened butter, ½ c. granulated sugar, ½ c. brown sugar, creamy peanut butter, and the egg. Beat with an electric mixer on medium speed until the mixture is smooth and the butter is fully creamed.
💡 Samantha’s Pro Tip: Use a cross‑section smoother like a manual whisk and keep the mixture cold for a lighter crumb.
Step 2: Add Dry Ingredients
Whisk the flour, baking soda, baking powder and salt together, then add them by hand to the wet mixture. Stir with a spatula until just combined. Fold in the milk chocolate chips gently so they’re evenly distributed.
⚠️ Common Mistake to Avoid: Over‑mixing the dough can bring down the chewy texture and cause the bars to crack.
Step 3: Press Dough into Pan
Press the dough evenly into the bottom of a greased 9×13‑inch pan. Sprinkle 2 teaspoons (or use white sparkling sugar) uniformly over the surface to help create that shine.
💡 Samantha’s Pro Tip: Tap the pan on the counter after filling to remove air pockets and help the dough spread radially.
Step 4: Bake
Bake at 350 °F for 22‑24 minutes, or until the edges puff up and the bars are a light golden brown. Keep an eye on the center; it should still be slightly soft.
⚠️ Common Mistake to Avoid: Baking too long, and the chocolate glaze may harden too quickly, making the Kisses brittle.
Step 5: Apply Hershey’s Kisses
Remove the pan from the oven and immediately lay the 24 unwrapped Hershey’s Kisses in a 4×6 pattern on top of the warm dough. Sprinkle the remaining teaspoon of sparkling sugar. The kisses will slightly melt, forming a glossy veil.
💡 Samantha’s Pro Tip: If you’d like a thicker glaze, press the kisses gently with a spatula so more chocolate covers the dough.
Step 6: Cool Completely
Let the pan cool at room temperature for at least 30 minutes, or until the Kisses and glaze firm up. This step is critical to ensure each bar has a centered kiss that won’t smudge.
⚠️ Common Mistake to Avoid: Touching the Kisses before the bars are cool; they will sag and lose their iconic shape.
Step 7: Cut into Bars
Once the bars have fully cooled, cut along the pan lines into 30 individual squares, ensuring each one contains a Hershey’s Kiss in the center. This will give you an even distribution of both peanut‑buttery dough and chocolate.
💡 Samantha’s Pro Tip: Use a sharp serrated knife and a ruler to keep cuts consistent.
Step 8: Store
Store the bars in an airtight container at room temperature for up to 4 days, or in the refrigerator for up to 7 days. Keep them sealed to preserve moisture.
💡 Samantha’s Pro Tip: Spread a single layer of parchment paper between each bar if you’re stacking them long‑term.
| Step | Action | Duration | Key Visual Cue |
|---|---|---|---|
| 1 | Mix wet ingredients | 3‑4 minutes | Crème‑like smoothness |
| 2 | Add dry ingredients | 2‑3 minutes | Even lumps |
| 3 | Press dough into pan | 1 minute | Uniform thickness |
| 4 | Bake | 22‑24 min | Golden edges |
| 5 | Apply Kisses | 1‑2 min | Glossy banner |
| 6 | Cool | 30‑45 min | Firm glaze |
| 7 | Cut into bars | 5‑7 min | Rows of 4‑by‑6 |
| 8 | Store | As needed | Sealed container |
Serving & Presentation
Serve these bars on a decorative slate board alongside a cup of espresso or a cup of oat milk in a chic French café setting. Place a few whole bars on a platter, and you’ll have a quick yet elegant spread that feels like a handheld afternoon tea.
If you’re hosting a brunch at the Manhattan brunch spot or a family gathering, cut the bars into squares to serve as bite‑size snacks. Sprinkle a tiny pinch of sea salt on each bar for a salty‑sweet contrast that makes the chocolate kiss pop.
I often pair these with a light rice pudding or a drizzle of caramel sauce—anything that mirrors the buttery base but adds a creamy contrast. The result is a balanced bite that satisfies your cravings for both “dessert” and “snack.”
| Pairing Type | Suggestions | Why It Works |
|---|---|---|
| Side Dish | Mini croissants, charcuterie, roasted nuts | Crunchy, salty contrast to chewy bars. |
| Sauce / Dip | Caramel drizzle, sweetened cream, vanilla yogurt | Adds sweetness and creaminess, echoing butter. |
| Beverage | Espresso, chai latte, cold brew, sparkling water | Caffeine or fizz cuts through glaze, refreshing palate. |
| Garnish | Fresh raspberries, crushed pistachios, caramelized pecans | Adds color, texture, and a hint of extra flavor. |
Make-Ahead, Storage & Reheating
I double‑batch these for my busy week; the bars hold up nicely for up to a week in the refrigerator. The key is to keep them in a tightly sealed container, and if you’re craving them warm, a quick microwave reheat (10‑15 seconds) in an airtight mug will bring them back to that joyous melt.
| Method | Container | Duration | Reheating Tip |
|---|---|---|---|
| Refrigerator | Sealed plastic container | Up to 7 days | Remove 15‑sec microwave, cover with damp paper towel. |
| Freezer | Vacuum sealed bag | Up to 3 months | Thaw overnight in refrigerator; microwave 10 sec. |
| Make‑Ahead | Polished wooden board | Up to 2 days before baking | Assemble dough and press into pan; store; bake just before serving. |
When you refrigerate them, the chocolate glaze actually thickens and sets in a wonderfully deep golden tone—a little dessert‑in‑a‑day effect. To revive a chilled bar, a quick 10‑second microwave pulse while wrapped in a paper towel returns the wonderful glossy shine, much like a freshly baked snack out of the oven.
Variations & Easy Swaps
| Variation | Key Change | Best For | Difficulty Impact |
|---|---|---|---|
| Almond Butter Peanut Butter Blossom Bars | Replace peanut butter with almond | Gluten‑free, nutty twist | Same level |
| Gluten‑Free Peanut Butter Blossom Bars | Use almond flour & Xanthan gum | Allergies, celiac | A little more care |
| Dark Chocolate Peanut Butter Blossom Bars | Swap milk chips for dark | Richer taste, anti‑oxidants | Same |
Almond Butter Peanut Butter Blossom Bars
Swapping peanut butter for almond brings a lighter, slightly sweet flavor and a smoother mouthfeel. Using a high‑quality almond butter from Whole Foods adds a subtle earthiness that complements the chocolate kisses—great for an allergy‑friendly brunch platter.
Gluten‑Free Peanut Butter Blossom Bars
This version replaces all‑purpose flour with a blend of almond and oat flour plus a pinch of xanthan gum to prevent crumbling. The texture remains buttery but the crumb is slightly denser, making each bite a comforting, allergy‑safe snack.
Dark Chocolate Peanut Butter Blossom Bars
Replacing milk chocolate chips with dark chocolate chips brings a deeper cocoa note, turning the bars into a more adult‑oriented treat. The Kisses still melt beautifully, and the overall appearance stays the same, but you’ll get a richer, bittersweet finish.
How long do Peanut Butter Blossom Bars keep?
These bars stay fresh for up to 7 days when refrigerated in a sealed container, and up to 3 months if you freeze them in an airtight freezer bag. If kept at room temperature, they’ll hold the best flavor for roughly 3–4 days. The chocolate glaze remains firm at these temperatures, while the fudge‑like interior gently softens over time, giving each bite a slightly different texture as they age.
Can I use dairy‑free milk instead of butter?
No, butter is essential for the chewy texture and the base flavor. However, you can substitute butter with coconut oil if you prefer a dairy‑free option. This will change the flavor profile slightly, adding a subtle coconut hint, but the bars will still caramelize and produce a glossy glaze. Just be sure to keep the substitute cold before mixing.
Are these bars gluten‑free?
The core recipe is not gluten‑free because it uses all‑purpose flour. To make it gluten‑free, replace the flour with a dairy‑free blend such as almond + oat flour or a store‑bought gluten‑free flour mix, and add a pinch of xanthan gum to bind the dough. The resulting bars will hold shape and keep the glaze intact.
Why does the Hershey’s Kiss melt so well?
Hershey’s Kisses have a low milk‑fat content and a finely ground chocolate that melts quickly when in contact with hot dough. The resulting glaze forms a glossy film over the bars, giving that iconic “blossom” look. Timing is key—place the kisses immediately after baking to allow a brief melt before the dough starts to cool.
What can I use if I don’t have milk chocolate chips?
You can use any chocolate chips you prefer: dark chocolate, white chocolate, or even miniature chocolate bars chopped finely. Just remember that the flavor will shift accordingly. White chocolate will produce a creamier cloud while dark chocolate yields a richer finish and less sweetness.
Can I bake these bars at a lower temperature?
Baking at a lower temperature (around 320 °F) will result in a slightly longer bake time (30‑35 minutes) and slightly less golden edges. The chocolate glaze will still form, but the bars may appear chewier. For optimal browning and a crisp edge, stick to 350 °F as the recipe prescribes.
Do I need a parchment paper line in the pan?
While greasing the pan is sufficient to prevent sticking, lining with parchment paper adds an extra safety net and makes removal easier. It also keeps the edges from drying out, preserving a softer interior. I usually line the pan when I make more bars or when working with a hot oven.
How can I keep the Hershey’s Kisses from flattening during storage?
Once baked and cooled, keep the bars in a tightly sealed container and store them in a cool place. If you notice the kisses flattening, place a fresh parchment paper between each layer or wrap each bar individually with cling film before refrigerating. This reduces direct pressure on the kisses and helps preserve their shape.
What other items can I add for a unique twist?
You can mix in finely chopped candied ginger for a touch of spice, or sprinkle ground cardamom for a subtle North African aroma. Another fun idea is to toss in a handful of toasted pistachios for crunch and color or replace some sugar with coconut sugar to add a subtle caramel tone. These additions will maintain the base structure but elevate the flavor narrative.
Share Your Version!
I’d love to hear your tweaks—whether you swapped in dark chocolate or added a pinch of cayenne. Drop a star rating and a comment below, and if you shoot a photo, tag me @mykitchenstorie on Instagram or Pinterest. What’s your favorite topping that makes Peanut Butter Blossom Bars unforgettable?
From my NYC kitchen to yours — I hope this recipe brings as much warmth to your table as it does to mine. — Samantha 🧡
Love This Recipe? Save It to Pinterest!
If you enjoyed this Peanut Butter Blossom Bars recipe, don’t let it get lost in your browser tabs! 😄 Pin it now so you can find it again anytime — and explore hundreds more tried‑and‑tested recipes waiting for you on my Pinterest boards.
👉 Follow Samantha on Pinterest @chefrecipes2
📌 Pin this recipe · 🔁 Re-pin your favorites · 💬 Tag me when you make it — I love seeing your creations!
Got a favorite snack that needs a bar makeover? Share your creative bread or pastry ideas below, and let’s keep the culinary conversation buzzing!
Peanut Butter Blossom Bars
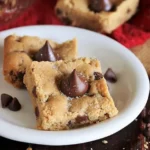
We all know and love iconic Peanut Butter Blossom cookies — but why not enjoy this classic treat in easy bar form? Just like their classic cookie inspiration, Peanut Butter Blossom Bars are rich in peanut butter flavor with that signature Hershey’s Kiss perched deliciously on top. And they’re super easy to make, too.
Ingredients
- 1/2 c. unsalted butter, softened
- 1/2 c. granulated sugar
- 1/2 c. brown sugar
- 1/2 c. creamy peanut butter
- 1 egg
- 1 1/2 c. all-purpose flour
- 3/4 tsp. baking soda
- 1/2 tsp. baking powder
- 1/8 tsp. salt
- 2/3 c. milk chocolate chips
- 24 Hershey's Kisses, unwrapped
- 3 tsp. white sparkling sugar OR granulated sugar
Instructions
- In large mixing bowl, combine the butter, 1/2 cup granulated sugar, brown sugar, peanut butter, and egg. Beat with an electric mixer on medium speed until well mixed.
- By hand, stir in flour, baking soda, baking powder, and salt until just combined and a dough forms. Stir in milk chocolate chips.
- Press dough into the bottom of a greased 9×13-inch baking pan. Sprinkle evenly with 2 teaspoons of the white sparkling sugar (or granulated sugar).
- Bake at 350x for 22-24 minutes, or until puffed up all over and golden brown.
- Remove from oven and immediately top with unwrapped Hershey's Kisses in a 4 rows by 6 rows pattern. Sprinkle with remaining teaspoon of the white sparkling sugar (or granulated sugar).
- Cool completely. Cut into squares with one of the Hershey's Kisses in the center of each bar.
- Store in an airtight container.
- The dough will be a stiff, almost crumbly dough.
- After placing the Hershey's Kisses on the baked bars, don't touch the Kisses again until the bars are completely cooled. The Kisses do melt (and glisten) from the heat of the baked bars, but do keep their shape. If you touch the Kisses at this point, they will smush and their shape will warp.
Leave a Reply