Table of Contents
Easy Vanilla Crème Brûlée Recipe – No-Torch, Creamy & Perfect
I still remember the first time I cracked through a perfectly caramelized crème brûlée. It was in Paris, during my pastry training at Le Cordon Bleu, and the sound—that sharp, glassy shatter—was pure magic. But back then, we used a blowtorch, and it took me weeks to get the sugar just right without burning it. Fast forward to my tiny NYC apartment kitchen, and I knew there had to be a way to get that same creamy custard and crispy caramel top without specialty equipment. That’s how I developed this easy vanilla crème brûlée recipe—a no-torch method that uses your oven’s broiler to create that iconic shell. This recipe is perfect for beginners, made with just 4 ingredients, and delivers the silkiest, most foolproof crème brûlée every single time.
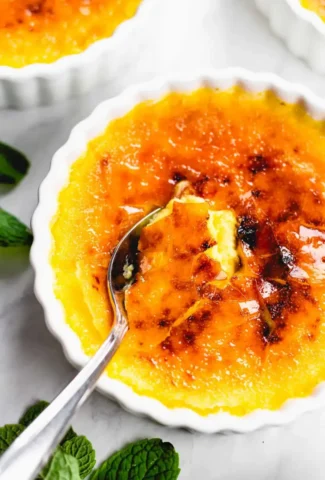
When you take a spoonful, you get that first satisfying crack of caramelized sugar, followed by a luscious, velvety custard that’s rich with vanilla. The texture is like a dream—smooth as silk, not too thick, not too runny. The aroma of vanilla fills your kitchen as it bakes, and the golden sugar top shimmers under the light. I love how this dessert feels so elegant, yet it’s so simple to make. It’s the kind of treat that makes any dinner feel special, whether you’re hosting friends from the farmers market or just treating yourself on a quiet Tuesday. I always think of my mother’s kitchen in Morocco, where she would make similar custards with local milk and rose water—this version is a tribute to that, with a classic French twist.
What sets this easy crème brûlée apart is my approach to the water bath and the broiler finish. In culinary school, I learned that the key to a creamy custard is gentle, even heat—and that’s exactly what we achieve here with a simple bain-marie. Then, instead of a torch, we use the broiler to caramelize the sugar. It’s a technique I’ve perfected over years of testing, and it works like a charm. I’ll also share my best pro tip to avoid scrambling the eggs and a common mistake that makes the custard watery. With this recipe, you’ll get a stunning, restaurant-quality dessert that’s ready for any occasion.
Why This Easy Vanilla Crème Brûlée Recipe Is the Best
The flavor secret is in the simplicity. I use pure vanilla extract—good quality, like the sort I pick up from my go-to spice shop in the East Village. It infuses the cream with a warm, floral sweetness that’s never artificial. In my Paris training, we learned that vanilla should be the star, not the sugar. That’s why this recipe has a balanced sweetness, letting the custard’s natural creaminess shine. And because I grew up in Morocco, where desserts often rely on subtle spice blends, I know how to layer flavors without overpowering them—this crème brûlée is a perfect example of that philosophy.
The texture is perfected through a careful tempering technique. When you whisk the egg yolks with sugar, you’re creating a base that, when combined with warm cream, yields a custard that’s uniquely silky. The water bath ensures the custard cooks gently, and I’ve nailed the exact baking time so the center stays slightly jiggly—like Jell-O, as I like to say. Overbaking is the number one culprit for a grainy texture, and my step-by-step directions prevent that. Every batch I’ve made in my NYC kitchen has come out creamy and flawless.
This easy vanilla crème brûlée recipe is foolproof and fast because it requires no torch and no special skills. The broiler method for caramelizing the sugar is a game-changer for home cooks—you just watch it closely, and in 1–2 minutes, you get that perfect glassy top. I’ve tested this with beginners, and they’ve all succeeded. Plus, you make it ahead, so it’s perfect for dinner parties or busy weeknights. And let’s be honest: who wouldn’t want a dessert that looks like it came from a fancy French bistro but takes just 15 minutes of active prep?
Easy Vanilla Crème Brûlée Ingredients
When I shop for these ingredients in NYC, I go to the Union Square Greenmarket for farm-fresh cream and eggs, but any supermarket will do. The cream should be heavy, the eggs organic, and the vanilla something you’d be happy to smell on its own. The ingredients are few, so each one matters—just like in my mother’s traditional Moroccan desserts.
Ingredients List
- 2 cups heavy cream (not half-and-half—trust me)
- 1 teaspoon pure vanilla extract
- 6 large egg yolks (room temperature is best)
- 1/3 cup granulated sugar (for the custard base)
- 4 tablespoons granulated sugar (for the caramel topping)
- 1 kettle of hot water (for the water bath)
Ingredient Spotlight
Heavy cream is the heart of this dessert. It gives the crème brûlée its signature richness and silky mouthfeel. Look for cream with at least 36% milk fat—it’s usually labeled “heavy cream” in US stores. Avoid “whipping cream,” which has less fat and can make the custard thinner. One excellent substitute is a combination of whole milk and butter, but the texture won’t be as lush. For a dairy-free version, full-fat oat milk is my top pick—it’s creamy and neutral, though the custard will be slightly less decadent.
Vanilla extract is your flavor backbone. I always use pure vanilla extract, not imitation, because the flavor is deeper and more complex. For a real treat, use a vanilla bean: split it, scrape the seeds into the cream, and steep it while heating. One vanilla bean equals about 1 teaspoon of extract. If you’re out of extract, vanilla paste works 1:1. Imitation vanilla will work in a pinch, but the taste will be noticeably different.
Egg yolks are the thickening agent that gives this custard its structure. Fresh, large yolks from pasture-raised eggs yield a richer color and smoother consistency. Room-temperature yolks blend more easily with the cream, reducing the risk of curdling. If you only have cold eggs, let them sit on the counter for 15 minutes. You can’t substitute whole eggs here—the whites would make the custard rubbery. One hack: if you’re short on yolks, you can use 5 extra-large yolks instead of 6 large.
| Original Ingredient | Best Substitution | Flavor / Texture Impact |
|---|---|---|
| Heavy cream | Full-fat oat milk | Slightly thinner, less rich, but still creamy |
| Vanilla extract | 1 vanilla bean (split and scraped) | More aromatic, visible vanilla flecks |
| Egg yolks (6 large) | 5 extra-large egg yolks | Same richness, slightly less volume |
| Granulated sugar | Coconut sugar (for topping) | Darker caramel, slightly nutty flavor |
How to Make Easy Vanilla Crème Brûlée — Step-by-Step
Making this easy vanilla crème brûlée is as simple as it gets. Follow each step, and you’ll have a professional-quality dessert that’s creamy on the inside and crispy on top. I’ve included my best pro tips and the most common mistakes to watch out for, so you nail it every time.
Step 1: Preheat and Prepare Water Bath
Preheat your oven to 325°F. Bring a kettle or pot of water to a boil—you’ll need about 4 cups of hot water. The water bath, or bain-marie, ensures gentle, even cooking, which is the secret to a creamy custard. Without it, the edges would cook too fast and the center would be underdone. Pour the water into a large baking dish after you’ve added the ramekins.
💡 Samantha’s Pro Tip: Use a shallow baking dish that can hold your 4 ramekins with at least 1 inch of space between them. This allows the hot water to circulate, cooking each custard equally.
Step 2: Heat Cream and Vanilla
In a medium saucepan, combine the heavy cream and vanilla extract. Heat over medium flame until small bubbles form around the edges—this is called “scalding.” Do not let it boil, or the cream might curdle. Once you see those bubbles, remove from heat and let it sit for 5 minutes to allow the vanilla to infuse the cream fully.
⚠️ Common Mistake to Avoid: If the cream boils, the fat may separate, leading to a greasy custard. Watch carefully and keep the heat medium—never high.
Step 3: Whisk Egg Yolks and Sugar
In a medium bowl, whisk together the egg yolks and granulated sugar until the mixture thickens and turns a pale, lemon-yellow color. This takes about 3–5 minutes with a hand whisk, or 2 minutes with an electric mixer on low. You want it to “ribbon” when you lift the whisk—meaning it falls back in a smooth, thick ribbon.
💡 Samantha’s Pro Tip: Whisking aerates the mixture, which helps create a lighter, silkier texture. Don’t skip this step—it’s the key to a smooth custard and a consistent easy crème brûlée.
Step 4: Temper the Egg Mixture
Gradually pour the warm cream into the egg yolk mixture in a slow, steady stream while whisking constantly. This is called tempering—it slowly raises the temperature of the eggs without scrambling them. If you pour too fast, you’ll end up with lumps. Once combined, strain the custard through a fine-mesh sieve into a clean bowl to catch any stray bits of cooked egg or cream solids.
⚠️ Common Mistake to Avoid: Pouring the cream too quickly is the most common reason for a scrambled custard. Go slow and keep whisking—about 30 seconds to pour the entire 2 cups.
Step 5: Fill Ramekins and Water Bath
Divide the custard evenly among 4 shallow ramekins (6–8 oz each). I like to pour through a spouted measuring cup for accuracy. Place them in the baking dish, then carefully pour the hot water into the dish until it reaches about ¾ up the sides of the ramekins—be careful not to splash water into the custard.
💡 Samantha’s Pro Tip: For even easier cleanup, place a kitchen towel in the bottom of the baking dish before adding the ramekins. It prevents them from sliding and insulates the bottoms for more even cooking.
Step 6: Bake and Chill
Bake at 325°F for 30–35 minutes. The edges should be set, but the center should jiggle slightly—like a firm Jell-O. Remove from the oven and carefully take the ramekins out of the water bath. Let them cool on a wire rack to room temperature, then cover with plastic wrap and refrigerate for at least 4 hours, or overnight for the best texture.
⚠️ Common Mistake to Avoid: Overbaking is the number one texture killer. If the center doesn’t jiggle at all, it’s likely overdone. Pull it out when it’s just barely set—residual heat will finish the cooking.
Step 7: Caramelize the Sugar
Just before serving, sprinkle 1 tablespoon of granulated sugar evenly over each chilled custard. For the no-torch method, place the ramekins on a baking sheet and put them under the oven’s broiler on high for 1–2 minutes. Watch closely—sugar can burn quickly. Rotate the tray if needed for even browning. Once golden and bubbling, remove and let sit for 1 minute to harden into a crispy shell.
💡 Samantha’s Pro Tip: To ensure even caramelization, tilt the ramekin to spread the sugar into an even layer. If some spots are burning while others are pale, use a spoon to nudge the sugar around.
Step 8: Serve and Crack
Serve immediately after caramelizing—the contrast between the warm, brittle top and the cool, creamy custard is what makes this dessert so irresistible. You can top with fresh berries like raspberries or a dusting of powdered sugar if you like. Enjoy that satisfying crack with every spoonful!
| Step | Action | Duration | Key Visual Cue |
|---|---|---|---|
| 1 | Preheat & boil water | 5–10 mins | Oven at 325°F; water boiling |
| 2 | Scald cream & vanilla | 5–7 mins | Small bubbles around edges; no boil |
| 3 | Whisk yolks & sugar | 3–5 mins | Thick, pale yellow, ribbons off whisk |
| 4 | Temper & strain | 2 mins | Smooth, no lumps |
| 5 | Fill & water bath | 3 mins | Water reaches ¾ up ramekins |
| 6 | Bake | 30–35 mins | Edges set, center jiggles like Jell-O |
| 7 | Chill | 4+ hours | Firm to the touch, no wiggle |
| 8 | Caramelize sugar | 1–2 mins under broiler | Golden, bubbly, glassy top |
Serving & Presentation
This easy vanilla crème brûlée is ready to shine the moment the sugar hardens. The classic way to serve it is straight from the ramekin—no unmolding needed. I like to set each ramekin on a small plate with a crisp linen napkin underneath for a touch of elegance. The contrast between the warm, caramelized top and the cold custard is the whole point, so serve it within minutes of caramelizing. For a pop of color
Print
Easy Vanilla Crème Brûlée Recipe

Learn how to make an easy vanilla crème brûlée with just 4 ingredients! This beginner-friendly recipe delivers a creamy custard and crispy caramel topno torch needed. Perfect for any occasion!
Ingredients
- 2 cups heavy cream
- 1 teaspoon vanilla extract
- 6 egg yolks
- 1/3 cup granulated sugar
- 4 tablespoons granulated sugar (for topping)
- 1 kettle of hot water
Instructions
- Preheat your oven to 325°F. Bring a kettle or pot of water to a boil for the water bath. This ensures even cooking for that creamy texture in your vanilla crème brûlée.
- In a saucepan over medium heat, combine 2 cups heavy cream and 1 teaspoon vanilla extract. Heat until it just starts to simmer (small bubbles around the edges)do not boil. Remove from heat and set aside to infuse for 5 minutes.
- In a medium bowl, whisk together 6 egg yolks and 1/3 cup granulated sugar until the mixture thickens and turns pale yellow (about 3-5 minutes with a hand whisk or electric mixer on low). This step is key to a smooth custard.
- Gradually pour the warm cream into the egg mixture in a slow stream, whisking constantly to prevent curdling. This tempering technique ensures your easy crème brûlée stays silky. Strain through a fine-mesh sieve if needed to remove any lumps.
- Divide the custard evenly among 4 shallow ramekins (6-8 oz each). Place them in a large baking dish. Carefully pour the boiling water into the dish until it reaches about ¾ up the sides of the ramekinscreating a water bath for gentle baking.
- Bake at 325F for 30-35 minutes until the edges are set but the center still jiggles slightly (like Jell-O). Avoid overbaking to keep it creamy. Remove from the oven and water bath, let cool to room temperature, then cover with plastic wrap and refrigerate for at least 4 hours (or overnight for best results).
- Before serving, sprinkle 1 tablespoon granulated sugar evenly over each chilled custard. Use a kitchen torch to melt and caramelize the sugar until golden and bubbly. No torch? Place under your oven's broiler on high for 1-2 minutes, watching closely to avoid burning. Let sit for 1 minute to harden into a crispy shell.
- Serve immediately for that satisfying crack. Top with berries if desired.
Leave a Reply